IMPORTANT NOTE (2025.07.04): UL have largely adopted IEC code for electric sauna heaters which will positively affect several areas including heater selection, ventilation and placement of the thermostat sensor. I’ll post updates on this here: https://medium.com/@trumpkin
Reading Time: There is a lot of information here. This is a book length manuscript (sorely-in-need-of-a-rewrite-that’s-hopefully-coming-in-2025). It is not a short article or blog post. Grab some tea, a beer, wine, coffee or scotch and enjoy.
If you’ve not yet done so, please first read or at least skim 1. Intro To Sauna, 2. Thermal Experiences & Glossary, 3. The Thermal Suite, and 4. Sauna Dynamics in the top menu. Much of the following is incomplete without some understanding of these.
Trumpkin Blog: Medium | Trumpkin
This thing that people in Finland (and Germany, Sweden, Austria, etc.) call a sauna is all about the specific, unique and quite wonderful bather experience it provides – a hygienic environment of even, gentle, indirect, convective heat caressing bathers bodies, and for Finnish Sauna the contrast of naturally dry air punctuated by bursts of steam. Sauna is about much more than just heat and just because a room is hot doesn’t make it a sauna.
Sauna is also more than just the hot room. It’s a routine of Hot, Cold, Rest, Rinse, Repeat. These must all be at least minimally provided for.
Falling too short of these design principles results in a lessor experience and one that frequently leads to abandonment of the sauna (and so wasted money) after the novelty wears off.
If you want a sauna, purely for enjoyment or for the health benefits, then achieving this bather experience is the goal – and very much worth the effort.
Good Sauna is like wine and sex. Quite enjoyable and healthy.
– Trumpkin’s Sauna Notes
Experience: A Sauna, be it Finnish, Bio or Hay, is distinguished by a unique bather experience with the following characteristics:
- We Are Heated By A Hot Air Bath Of Gentle Convective Heat That Evenly Caresses Our Entire Body; head to toes, front to back and minute to minute. Every inch of our body is enveloped evenly by this hot air. We are bathed, or immersed, in hot air. Ideally our feet are no more than about 15% colder than our head though as much as 20% is still good and 27% perhaps acceptable.
- We Can Choose Any Temperature from 70-105°c (ideally ± 10°c) for the convective heat that we feel on our bodies.
- We Feel No Noticeable Direct (Radiant) Heat from the heater or the wall in front of us. Nor any heat that is point-source, harsh, or uneven.
- We Have Continuous Fresh Air To Breath without high levels of CO2, VOC’s, Pathogens, Carcinogens or odors.
- We Are Not Exposed To Unhealthy Levels of Bacteria, Fungi, Mold or Other Harmful Elements.
- We Are Enveloped In Good Steam. A burst of steam in a Finnish sauna by throwing water on the stones or a constant drip in a bio sauna. This steam is both intense and gentle. It somewhat follows the convective loop, descends down on us from the ceiling and envelopes our entire body evenly head to toes. The burst of steam in a Finnish sauna should be exhausted within about 2 minutes (so that we can do it again!).
- There Is A Bit Of Comforting Air Movement over our body from a convective loop of hot air rising from the heater and descending down on us from the ceiling. Maybe almost unnoticeable and just enough for evaporative cooling of our skin to keep us more comfortable. Not too much air movement though as that would be uncomfortable.
- We Feel No Cool Drafts, even when someone opens the door.
- We Can Cool Down And Rest. We have good options for cooling down between rounds in the hot room such as a cool shower, jumping in a lake, sea or plunge pool, or sitting outside in cooler air.
- We Have A Space to Shower And Pre-Warm our body before entering the hot sauna room.
- We Are In A Calm Quiet Relaxing Environment without distractions or annoyances.
If you visit saunas in Finland or most of Europe that is generally the experience you will have. It is quite wonderful and is why sauna rather than other experiences is so popular.
Design Principles: With that experience as our goal, how do we achieve it? There are numerous ways to go about it but the realities of physics limit our options somewhat. Critical design principles are:
- Feet ABOVE The Stones – Finns call this ‘the first law of lóyly’ and it is one of the most critical elements of sauna design. And for numerous good reasons including more even temps and steam. This does require about an 260cm (8.5’) high ceiling which, though common outside of the U.S., is not so common in the U.S. Ignore information that says a 7’ or 7.5’ ceiling is best. It’s not. That low of ceiling results in the dreaded ‘cold toes’ that people in Europe avoid at all costs. This does generally require either three benches (typical in Finland, Germany, Sweden, and elsewhere.) or a high platform with benches. ‘Above’ is ideally by at least 20cm (8”) above.
- Open Mesh Tower heaters are proving to not be much of an exception to this, particularly with steam. Feet still need to be above the stones.
- Air circulators like Saunum can help when ceiling height is constrained but still fall short of a proper sauna experience, so if possible still aim for the larger space with a standard heater.
- Feet ABOVE The Cold Zone – Our entire body, and thus the foot bench, should be above the Cold Zone which is the lower third of the volume of space (height in a typical cabin sauna). This regardless of the stones height. Our entire body should be in the upper 2/3’s of the space.
- Ventilation – 9-12 liters/second (20-25 CFM) per person to remove exhaled CO2 and other contaminants. Downdraft is usually best and Mechanical Downdraft for electrically heated saunas. Our goal is to keep CO2 below 700 ppm.
- Heater Some Distance From Bathers – Bathers should not feel any noticeable direct (radiant) heat from the heater nor any heat or steam rising in to or near their face. There should be sufficient heater wall to bench wall distance for a good convective loop. A minimum of 90cm (3’) clear space between the heater and foot bench is best though more is better. Generally, the further we are from the heater, the better the convective loop and overall experience.
- Sauna Heater – The heater should have sufficient stone mass above the heat source, produce significant convective heat, a convective loop and as little radiant heat as possible. Those made by companies such as Narvi, Iki, Helo and Misa are designed to do this. Harvia is a value brand that is more hit or miss but some models are good. Heavy steel stoves produce too much radiant heat, too weak of a convective loop, harsh steam and generally do not make for good sauna heaters.
- A Larger Room – The larger the space, the more even and comfortable the temps and steam are. About 250x250x260cm (8’w x 8’d x 8.5’h) makes for a good sauna. This works well for 1 to 4 people, results in more even comfortable heat and steam, fresher air to breath and less uncomfortable radiant. Every cm less, even for just one person, reduces the sauna experience. Smaller is sometimes necessary but for the best experience reduce as little as possible and I think never below 180×180 (6’ x 6’)
- Changing/Commons Area – This is critical, especially in cold climates, to provide an air-lock as well as a space to pre-warm our body before entering the hot sauna. Going directly from very cold to very hot is not advisable. In temperate climates like Los Angeles this can be out of doors.
- Showers – Having a couple of showers or more adjacent to and easily accessible to the hot room is very beneficial and for people who sauna regularly is largely a requirement. Typically at least one for every two people.
- Cooldown Options & Outside – Lake, Sea, Pool, Sitting Outside, etc. Even with a cold plunge inside we should still be able to see outside and easily go outside for fresh air.
- Location – The sauna should be located in an area that is quiet, calm and relaxing, ideally has easy access to outside, and is in a public space. Locker rooms and master baths should generally be avoided.
Each one of these has a functional purpose in achieving our goal.
Other important things to consider:
- Ceiling Slope Higher Over Benches – If the ceiling is sloped then it should be higher over the benches and lower over the heater.
- Bench Air Gaps – Benches should interfere with airflow as little as possible. You need sufficient air gaps in the benches, ideally a larger gap between the benches and wall, and little or no skirt.
- Wood – The walls, ceiling and benches should be of soft wood for its hygroscopic and noise quieting properties. Spruce, pine and various other soft woods work well. Cedar and similar woods should generally be avoided. Glass should be limited.
- Drain – A trough or linear drain is easy to do and is very nice to have.
Here’s a one page cheat sheet:

Health Benefits: While these all make for a more enjoyable experience, they are likely critical for any health benefits. In particular for health; very even convective heat with less than ≈22% head to toes difference, good air quality with low CO2 and no noticeable radiant.
There are numerous other details below, both for the sauna hot room itself and supporting facilities, that all together contribute to making for a better sauna and a better, more enjoyable and healthier sauna experience.

On the path to building our new sauna we learned that there is a lot of not so good (or downright bad and misleading) information on the web and from english speaking sauna vendors, and that there are a lot of details that are critical to get right and easy to get wrong.
Everything we found in English – books, forums, Reddit, Facebook, local sauna builders, and websites – consistently recommended 7’ ceilings, benches too low, ventilation that doesn’t ventilate, high radiant heavy steel stoves, cedar a requirement, and other things that just didn’t make sense from a physics standpoint and didn’t match with the saunas we’ve experienced in Finland and elsewhere in Europe over the past 35 years. But when we searched in Swedish, Finnish and German we saw much different information and information that does make good sense – like for ceilings ‘higher is better’.
Why such a difference? Why do folks in the U.S. build saunas so different from those in Finland? And why are the saunas we’ve experienced in Finland and elsewhere around the world so much better than those in the U.S.?
We in the english speaking world are good at building things that we think look like saunas, just not so good at building things that really are saunas and that, most importantly, function like a sauna.
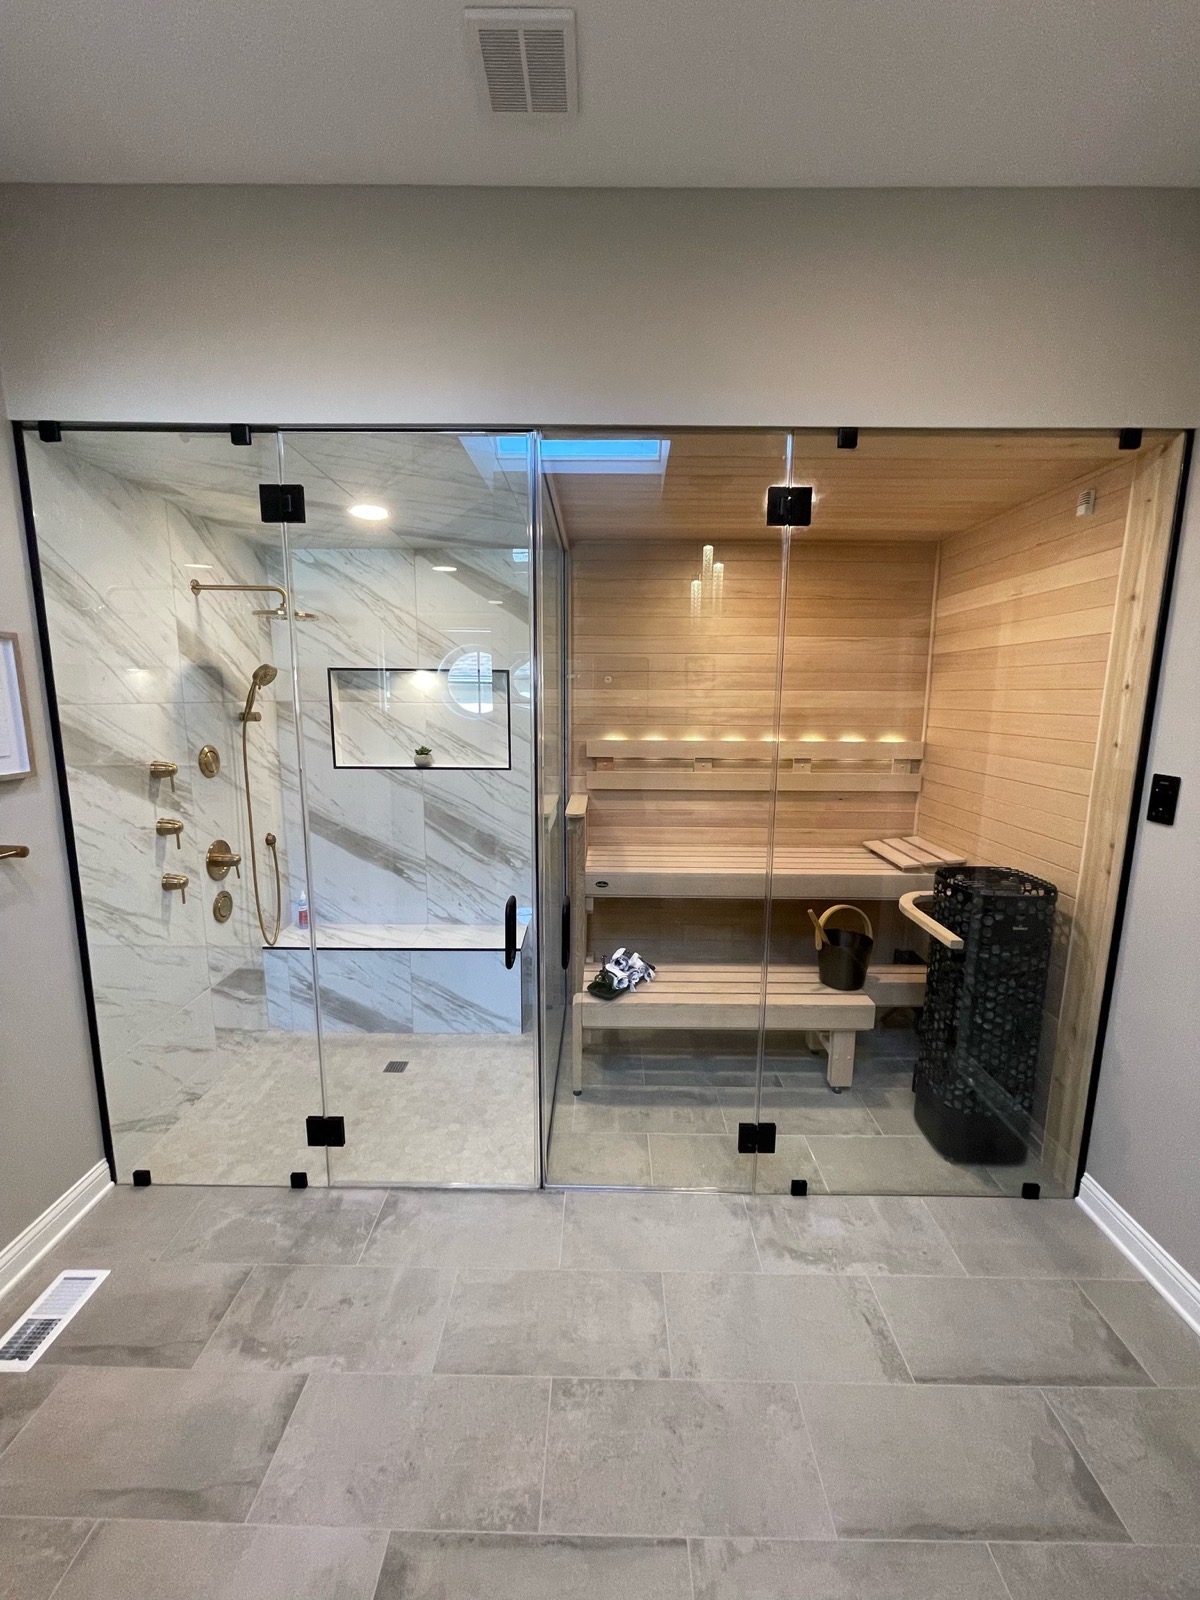 Something you’ll not see in Finland – a psuedo-sauna with only 2 low benches down in the cold zone. Especially when there is obviously space to have done it correctly with a higher ceiling and benches. Bathers in this sauna are down in the cold zone and not up in the good heat and steam of a löyly cavity – they will have the dreaded ‘cold feet’. There are no signs of proper (or any?) ventilation, the door is too high so valuable heat will be lost when it’s opened. Bathers in this sauna will not experience good löyly. A friend in Finland called this sauna ‘anemic’.
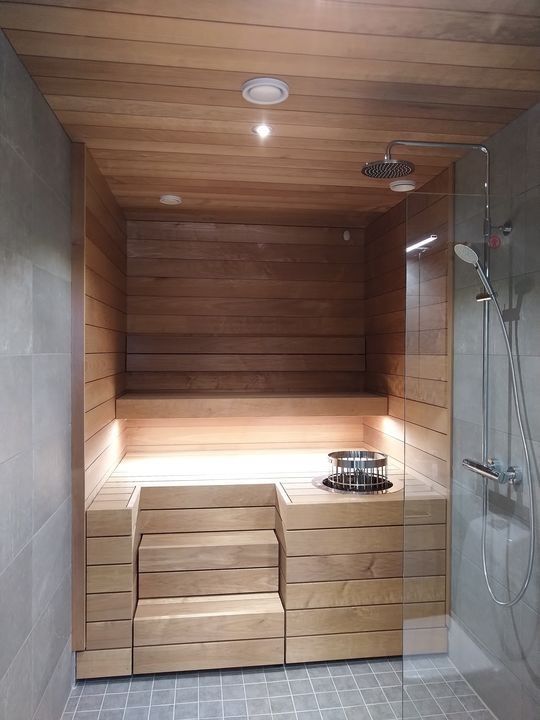 This similarly small footprint ≈6’ x 6.4’ x 8.3′ sauna has proper higher benches – the foot platform and so bathers feet are above the Cold Zone – they will have more even temperatures and steam, and will not have ‘cold feet’. Note the fresh air supply for downdraft ventilation in the ceiling above the heater and thermostat sensor at head height on the back wall rather than over the heater. There is also mechanical exhaust on the back wall below the foot platform. This sauna will have good löyly and be a much more comfortable and enjoyable experience than the anemic one. BTW, the steps can be pulled out for cleaning underneath.
The first sauna is the making of a short-lived fad – it looks good, it’s something to show off to our friends, its trendy, but after a year or three we’ll stop using it because it’s not really that great of an experience – all show and no substance.
The second sauna will be used continuously for years and decades to come because it provides a wonderful experience that we always look forward to.
—-
Following are largely my notes from 2017-2019 as we were designing and building our new sauna and trying to figure out what made for a good sauna. This is the result of trips to Finland, Sweden, Germany, Austria and many other countries, numerous conversations with Finns, Swedes, Estonians, Germans and others about sauna and in particular what a sauna is, how they work and how to build one, a lot of translating of Finnish, German and other languages to English and dredging up physics concepts I’ve not thought about since Uni.
Finns get it right when it comes to building good saunas (and ’sauna’ is after all, a Finnish word). They know what they’re talking about. When they are so emphatic about ‘feet above the stones’, there are very good reasons.
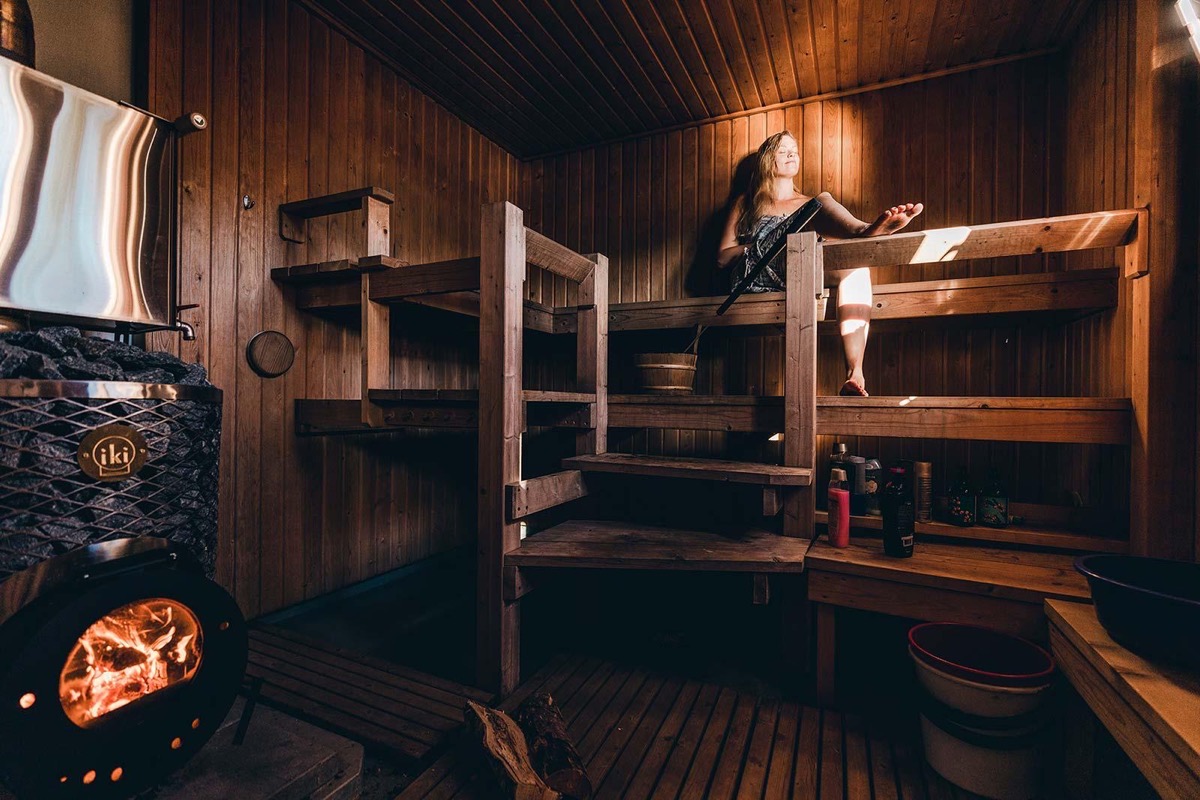 A typical 8’x9’x9’ 4-person family sauna with proper high benches that get bathers away from the radiant of the heater and up in the löyly cavity. More photos here.
If you want a sauna in Finland then you hire a sauna builder and a good one will build a sauna as described here. Good sauna builders in Finland know all of this. That’s not currently the case in North America where you’re more likely to get something like the anemic low bench sauna in the first photo above.
My goal is for people in North America and elsewhere to be able to experience the same things that we’ve experienced in Finland, Germany, Austria and around the world. And hopefully the best of what we’ve experienced. We travel a fair bit for work and enjoyment (144 transatlantic flights, rarely in business class, and counting) and have enjoyed saunas and other thermal experiences around the world for over 30 years. For fun, here’s some insight on the Spa Saunas in the South Tyrol of Italy from our fall 2023 visit.
If you want this experience that Finns call a sauna (and you do, real saunas are quite wonderful) then you, your builder or both should read and understand what’s here and ideally also Lassi’s “Secrets of Finnish Sauna Design’ book (and note that his new book ‘Finnish Sauna: Steam, Wood, Stone and How to Build Your Own‘ will be out in Sep 2025).
If you want to begin to fully understand saunas, how they work, how they’ve evolved and how to build them then also read; ‘Sauna the Finnish Bath‘ by H. J. Viherjuuri, ‘The Sauna Book’ by Johnson & Miller, ‘The Sauna Is’ by Bernard Hillala and ‘Finnish Sauna: Design & Construction’ by Rakennustieto Publishing. Then talk to Kimmo about a visit to Finland to tour some saunas and talk to some sauna experts and builders (and include a visit to a sauna world or two in Germany or nearby). Even if you’ve no plans to build a smoke sauna I’d also recommend reading ‘Building A Traditional Finnish Smoke Sauna’ by Jarmo Hiltunen. Then re-read this and Lassi’s book. Note also that Lassi is making some of his Saunologia articles available in real English (rather than the often humorous machine translations). And if you want to truly become a student of sauna then frequently experience saunas in Germany, Austria, Sweden, Finland and Estonia. There is no way to fully understand sauna without doing so.
Disclaimer: I am not an engineer nor doctor. Nor any kind of expert on sauna. The following is simply a bunch of notes on what we learned building our sauna and that we wish we’d known much sooner. Use at your own risk. Owner/builder is responsible for meeting any applicable building or related codes. I strongly encourage everyone reading this to do further research on all of these topics and in particular to read Lassi Liikkanen’s ‘Secrets of Finnish Sauna Design’ – the book that I really wish existed when we built our sauna. If you find any disagreement between what’s here and what Lassi says then Lassi’s book and website is the safer path. I also highly recommend Lassi as a consultant.
I hate seeing people taken advantage of. I have Asperger’s and that’s one of the interesting traits that comes with it. People in the U.S., due to our lack of knowledge about saunas, are frequently taken advantage of by sauna vendors. That’s not right. Hopefully what follows will help to alleviate some of this.
This is a journey. I am still learning and totally enjoying it. I am, to the best of my ability, trying to communicate what this thing that Finns, Germans and Swedes call sauna is. The goal of this is to be as accurate and informative as possible. If there is anything inaccurate below please let me know so that it can be corrected.
Note (2024.01): My wife has informed me, several times, that the hosting costs for Trumpkin are exceeding my allowance. This is good that so many people are reading (and hopefully benefiting!) from Trumpkin’s Notes and thank you for that. To help defray the costs and preserve peace in our own sauna… As an Amazon Associate I earn from qualifying purchases. This is simply for book purchases. It costs you nothing to use the links on this site but helps to cover the increasing costs for hosting. If there is any income beyond costs then excess will be donated to World Bicycle Relief or Not For Sale. These are both wonderful organizations that I’ve known since before their founding and, unlike too many similar organizations, simply get on with effectively getting the job done. If you are ever in Amsterdam, besides a good sauna (I’d recommend skipping the over popular Deco and instead try Spa Zuiver or Sauna Van Egmond) you should also visit Dignita for brunch. They are run by Not For Sale.
If you find value in these notes, please make a donation to Not For Sale, World Bicycle Relief, or an organization of your choice and please write in the notes “Trumpkin Sauna”.
2024.08.04 – Thank you to all of those who’ve contributed to Not For Sale and World Bicycle Relief! This makes a difference for those organizations and let’s me know that people are finding value in the work that I’ve put in to these notes.
Trumpkin? One of my favorite characters in Chronicles of Narnia. If you want a sauna built properly then he is who you want building it – he’ll get the details right. Below he’s making a point about the importance of getting benches up to the proper height 🙂 .

Why So Many North American Saunas Become Expensive Storage Closets
North America has a very high sauna abandonment rate. People are enthusiastic about sauna but then after a year or three, once the novelty wears off, they loose interest. The sauna is used a lot less, collects dust and then is either junked or becomes an expensive storage closet.
These abandoned saunas are seen over and over in homes for sale in the U.S. Sometimes the realtor requests that they be removed before the house is put on the market, sometimes they are just cleaned up. Occasionally a new homeowner wants to resurrect one of these abandoned saunas but within a year or three understands why it was abandoned. These poor quality saunas are why less than 1% of homes in the U.S. have a sauna while 20-80% of homes elsewhere do.
For most people, the 99.5% who are not hard core sauna junkies, small details can make the difference in a sauna that they want to use over and over continuously for decades and one that is not so enjoyable, collects dust, becomes a storage space or is hauled to the junk yard. The causes for this abandonment are generally;
- Poor air quality from bad ventilation and too small a space.
- Cold feet (too much temp & steam stratification) from too low of benches.
- No or poor steam
- Too much radiant heat from too small a space or wrong heater.
- Stagnant air resulting in skin not being cooled from too small a space and poor ventilation.
- No vestibule/changing/shower.
- Inadequate options for cooling between rounds such as easy access to outside, cold shower, cold plunge, etc.
These all contribute to a sauna experience that seems great at first but that we soon tire of or loose interest in. That’s why people in Finland and elsewhere work hard to avoid these pitfalls.
Our routine plays a role in this as well. Showering or rinsing before each round, multiple rounds of hot/cold contrast, and other bits can make the difference in an experience that’s inspiring and one that’s forgetful.
There are reasons that Finns, Germans and others build saunas the way that they do (see TL;DR above) and why they continue to frequently use and enjoy them for their entire lives. There’s a reason that people in Finland are so obstinate about ‘feet above the stones’, ventilation and other bits. That’s what these notes are about.

The Notes – Some Important Details We’ve Learned
So here, some notes on what we’ve learned about sauna design and building. Special thanks to Risto Elomaa, Lassi Liikkanen, Kimmo Raitio, Jarmo Lehtola, Eero Kilpi, Allison Bailes, Ted, Corentin Macqueron, the folks at VTT in Espoo FI, the numerous sauna builders across Finland, Sweden and Germany who responded to my endless queries and many others for their ideas and patience in answering my questions.
Hot Room Volume – Volume is critical for a good convective loop and fresh air for breathing.
Finnish official recommendation (RT Card) is overall minimum volume of at least 3 m³ (105 cubic feet) per person. For a better sauna however you need more than that, like 4-6 m³ per person.
The more volume per person the fresher the air will be. This also makes it possible to use lower ventilation rates for a more lingering steam as preferred in continental saunas while still maintaining low CO2 air quality.
Larger spaces have more even convective heat and steam on bathers bodies and less stratification and unevenness than smaller spaces. Smaller spaces have more harsh radiant heat from the heater and walls and can have people walking too close to the heater increasing the possibility of accidentally getting burned. Smaller spaces can feel claustrophobic.
In Finland saunas are generally classified as
- Small being less than 16 m³ (565 cf).
- Medium being 16-25 m³
- Large being 25-50 m³
A good starting point recommendation from Lassi Liikkanen for a small sauna is a 250 x 250 (8’ x 8’) interior floor space and 255cm (8’4”) interior height resulting in 16 m³ (565 cf) or 4 m³ / person (130cf/person). This is comfortable for 4 people, benches aren’t too close to the heater, gets the foot bench above the stones for most heaters, provides a good heat cavity and it will be easier to maintain good air quality.
Minimum Recommended Size – About 250 x 250cm x 260cm (8’ x 8’ x 8.4’ high) is a good minimum size. Every cm below that compromises the sauna experience, even for just a single person.
- Convective Loop: Topping the list is that you need distance between the heater wall and bench wall for a good convective loop. We want gentle indirect heat from the heater, not direct. As the heater to bench distance is decreased the more distorted the convective loop you’ll have and at some point, perhaps down around 6’, depending on the heater, you’ll have heat and steam rising directly up in to your face and against your front rather than comfortably descending down on you from above.
- Reduce Radiant: The heater and heater wall both give off radiant heat that can be uncomfortable and is undesirable. We want to reduce this as much as possible and ideally have no noticeable radiant from in front of us or from the sides. The further the heater is from us, usually the better.
- Evenness of Heat & Steam: The convective heat and steam is more even and gentle in a larger space than a smaller.
- Volume: Fresher air to breathe.
- More Forgiving: Of poor ceiling shape or other elements.
- Claustrophobic: A larger space is more comfortable for most people and significantly more for a few.
- Steepness: A larger space reduces how steep benches need to be for us to be up in the löyly cavity.
If you must go below 250×250 (8×8), remember that every cm counts. And similarly, I think a bit above, like 260×260 (8.5′ x 8.5’) can provide noticeable improvement if space allows (and obviously larger if it’s for more than 4 people).
Absolute Minimum Size – I would recommend never going below 180cm (6’) heater wall to bench wall x 160cm (5’) bench wall width. And I’d try to avoid going this small. This would have barely the minimum volume for two people so may have some air quality problems, may not have a good convective loop, bathers will likely feel too much radiant heat from the heater and heater wall, and it may feel cramped and claustrophobic. It may seem great for the first year or two that it’s a novelty but for many people is likely to not get used much or at all after about three or five years except for storage. I would not waste money building anything smaller.
Open Space – A lot of open space for good air circulation is important – and critical. Some people think this is ‘wasted space’ but it’s not, it’s what allows the convective loop to function properly. Three simple straight benches along the bench wall in a 250x250x260 (8’ x 8’ x 8.6’) interior space will result in a good sauna. Adding extra benches ‘to use up wasted space’ can degrade the convective loop and user experience.
Hot Room Shape – Generally an approximate cube (WxDxH) is best with a rectangle (longest wall should generally not be more than 20-40% longer than shortest wall) a close second. Beyond about 8.5’, the highest point of the ceiling should generally not be more than ≈110% to maybe 120% of the width or depth. IOW, a slightly tall cube or rectangle but not to an extreme. If it is too tall or the benches too high relative to how far we are from the heater then we can have heat rising in to our face which can be uncomfortable.
If you understand sauna physics then many shapes can be made to work well but you have to be careful to properly support convective currents for the best experience.
Be cautious about trapezoid and similar shapes. The narrower bottom of this ‘sauna’ (below) will result in a much higher cold zone (approx lower 1/3 of total volume of interior space). The cold zone here will be about the lower 1/2 of the height instead of just the lower 1/3 as in a sauna w/ straight sides. The low ceiling means that bathers will be sitting too low as well so they will have cold feet and legs. The lack of a heat cavity will result in a lot of heat loss every time the door is opened and this shape has much too little overall volume as well. A trapezoid can work but needs to be large enough that the foot bench is above the cold zone, has a sufficient heat cavity and has proper overall volume. The owners of this one below will, hopefully, still enjoy it as they are probably not familiar with sauna and so won’t know what they’re missing.
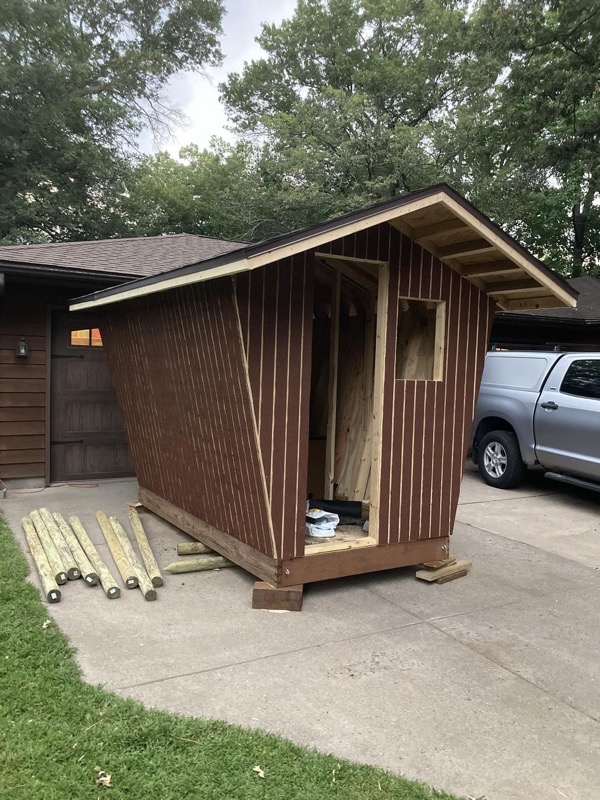 This shape will not result in a good sauna.
Ceiling Shape – Flat, coved, partial barrel vault/curved, vaulted/cathedral, and sloped/shed can all work well. Critically, we want the convective loop to flow smoothy as it rises up from the heater, across the ceiling and down on us.
The highest point of any of these, relative to the top of the walls, should generally not be greater than about 1/4 the heater wall to bench wall distance and ideally less. So for an 8’x8’x8.5′ sauna the interior peak of a vaulted ceiling should not be greater than 10.5’. Higher than this (steeper) can stall the convective loop, allow hotter air to stay trapped in the peak and increase stratification.
For vault or partial barrel vault the peak should run parallel to the longest bench wall so between the heater wall and bench wall. Try to avoid it being perpendicular. If perpendicular can’t be avoided then height is your friend – the higher the benches and ceilings the less it matters. For a partial barrel vault / curved ceiling, setting the radius point at floor level midway between the heater and bench walls usually works well.
For a sloped or shed ceiling the high side should be along the primary bench wall and the low side the heater wall. There should be a bit of flat or reverse slope on the high side to avoid any corners less than 90°. There are three reasons for this; 1) Heat goes to the highest part of the sauna, 2) when sloped the wrong way we’ll get turbulence rather than the smooth convective loop that we want, and 3) heat getting clogged up above the heater could be a fire hazard.. As above, somewhat minimal height difference from one side to the other is best. It’s also important to avoid heat & steam flowing up in to bather’s faces so the sitting bench may need to be lower relative to the ceiling here.
Domes and other 3D shapes can work but are tricky to get right.
Remember to include any extra volume above the top of the short walls in determining where the Cold Zone is.
Some good discussion and images here: https://saunologia.fi/in-english/finnish-sauna-essentials-part-6/
Avoid steeply vaulted, coved, sloped/shed or similar ceilings – In theory and in experience a near flat ceiling is best as it results in the most even temps. A slight rounded vault (radius greater than overall height) in the ceiling or angled coves in the corners can work well and help airflow. Heavily vaulted, coved or sloped ceilings can result in heat being up too high, reduce desirable air movement of the convective loop and result in bathers being much lower in the overall volume of space and often almost entirely in the cold zone. These, especially a steeper slope/shed, can also result in hot air flowing in to bathers faces which can be quite unpleasant.
These can also result in a claustrophobic feeling if bathers are staring in to a sloped ceiling in front of them rather than a more distant heater wall.
Ceiling slopes of more than about 1 in 10 or at most 1 in 8 should usually be avoided.
Avoid Angles of less than 90° – Ceiling to wall angles should always be 90° or greater.
Avoid Ceiling Beams or other elements that will interrupt the air flow of the convective loop.
Note that the best interior ceiling shape will often run contrary to exterior aesthetics and function. Given the importance this is one case where I would not sacrifice function for form. Here is a good example of how it can be done.
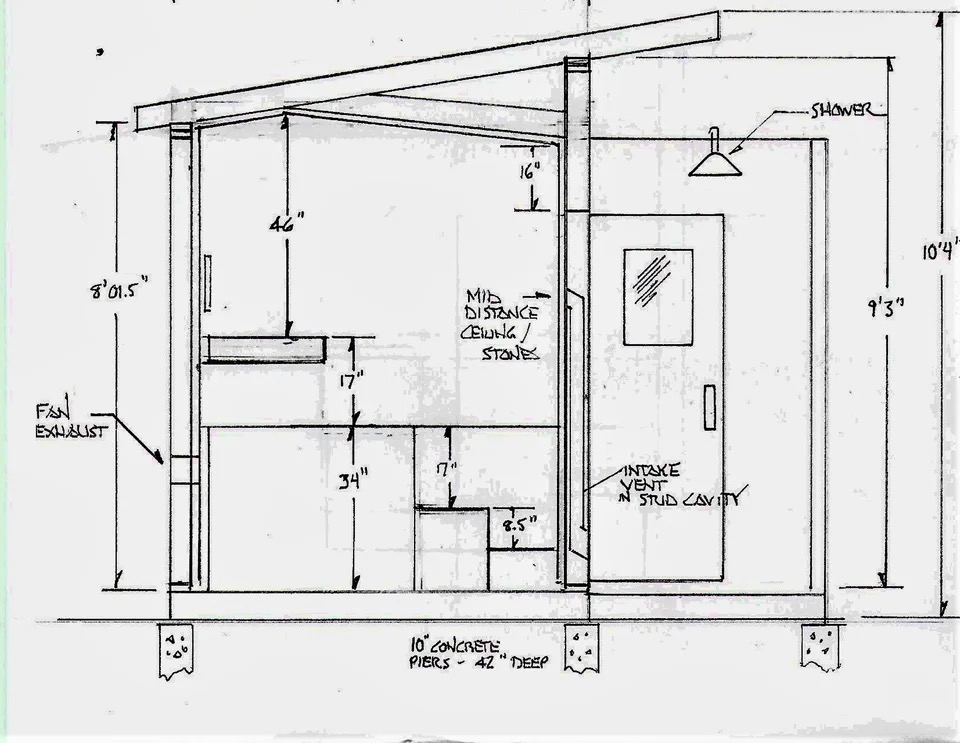 The interior ceiling has been modified to produce a good airflow while still allowing for an exterior shed roof that’s higher on the heater wall and entry door. The foot bench is 34” high and so above the cold zone and likely above the stones. 4-6” more ceiling and bench height would be good however. Note the updraft duct for the fresh air supply (labeled ‘intake vent’) – this will prevent it from back flowing (it should be higher inside however). Overall this should be relatively good sauna given its small size and better than 99% of saunas in North America. Some build photos here.
Heater and Bench Relationship: Creating The Löyly Cavity – The air near the heater is quite hot, rising up to the ceiling, it narrows briefly just above the heater and then spreads out as it rises. It then flows across the ceiling and descends on the opposite side of the space (the löyly cavity) before flowing back to above the heater – a convective loop. There is kind of an imaginary wall about halfway between the heater and any physical wall. This imaginary wall divides rising/stagnant/turbulent vs descending airflow. This imaginary wall can be parallel to the heater wall or diagonal/curved if the heater is in a corner. We want all of our body to be on the descending side of this imaginary wall, and not on the rising/stagnant/turbulent side.
In smaller saunas (less than about 9’x9’), the heater should ideally be on the wall opposite the benches, or with L shaped benches in the opposite corner. So we’ll have a Heater Wall or Heater Corner and opposite that a Bench Wall or Bench Corner. We want the heater and the stones to be fairly close to the heater wall. This creates a better convective loop and löyly cavity. The heat and steam rise from the heater, travel across the ceiling towards the bench wall until it nears the wall and then descends down on to bathers. We want to be on the wall, the half of the room, that it’s going down as this is comforting hot air or steam coming down and enveloping us on all sides.
We want to be some distance from the heater so that we don’t feel any direct radiant nor any rising hot air from the heater. Hot air spreads out as it rises. If you draw a line from the heater at about a 15-30° angle up to the ceiling, this is the rising heat plume. Bathers should not be within that and ideally, for the best experience where that line reaches the ceiling should be on the heater half of the room and not on the bench half.
We want to feel only convective heat in the portion of the convective loop where it is flowing downward. Ideally we need about 8’ heater wall to bench wall distance.
This works also for a heater in the middle of a U or parallel bench platform. The hot air and steam rise to the ceiling, then travel in all directions towards the walls and then down the walls. Our imaginary wall here is a cylinder around the heater. These seating arrangements should ideally be in a 3m x 3m (10’x10’) or larger space though somewhat smaller does seem to work with some heaters.
Benches on the same wall as the heater or next to the heater don’t get the full benefits of the convective loop and so bathers experience greater heat stratification and are less comfortable. In particular they can miss out on true löyly when the steam follows the convective loop and comes down enveloping us.
Heater On The Door Wall – Often it is good to have the door and heater on the same wall and with the benches on the opposite wall. There are several reasons for this. 1) Both the heater and door are ideally far from bathers to reduce radiant heat, create a good löyly cavity and so that bathers are not much interrupted by cold incoming air when the door opens. 2) The updraft from the heater is much stronger than the downdraft side of the convective loop so this causes the least interruption of the convective loop. 3) If the door is away from the heater then door openings result in a loss of heat from the heat cavity.
Heater to Bather Distance: Reduce Harsh Radiant Heat & Face Slap – Space between bathers and the heater is a good thing. The foot bench (or bathers toes) should be about 4x – 8x the clearance to combustibles for the heater. Or typically about 1 – 1.5m (40-60”).
While the radiant heat in a 120°f IR cabin or from a ceiling heater on a 45°f patio will feel quite nice, radiant can feel harsh in the higher temps of a sauna. Radiant is also uneven and heats us only on the side its coming from. A sauna is about being heated evenly all around by soft gentle convective heat. An IR Cabin is about being heated by radiant heat. This is also one reason why having the foot bench above the stones is important as that also helps to reduce direct radiant heat.
Having heat and steam rise in to bathers faces isn’t enjoyable. Greater distance between the heater and bathers helps to reduce this.
One caveat here is that many people also don’t want the heater too far away so that throwing water on to the stones is more difficult. So while bigger is better, there may be a limit. Others say that people just need better aim and technique 🙂
Bench and Ceiling Heights: Staying Out Of The Cold And In The Löyly Pocket – Bench and ceiling heights are critical for a good sauna and generally the higher the better as higher results in less stratification, more even heat, bathers more likely to be fully in the löyly cavity of even heat and steam, a larger heat cavity, greater likelihood of keeping bacteria and mold at bay and other benefits. A higher ceiling and benches can also sometimes reduce the importance of other elements such as ceiling shape. And this is regardless of heater design or power, no matter the heater, higher benches and ceiling will result in a better sauna experience.
“Think of Harley Davidson cruising with a 5 horsepower engine.”
– Sauna Sherpa Kimmo Raitio on saunas with too low of benches and poor ventilation
The Sitting Bench (the highest bench where people sit) should usually be ≈110-120cm (43-48”) below the ceiling. Ideally 120cm (48”) as this results in the best heat, comfort, reduces the likelihood of being hit in the face by the convective loop, and allows using a vihta.
Two Hands Above The Head? – Sounds nice but doesn’t really work. There’s no science to support it, nor sauna experience to support it. I and others have been in many good or nearly ideal saunas with the ceilings much more than 120cm above the sitting bench. Most critical is that whatever the ceiling height is, the foot bench should be above the stones and above the cold zone.
In saunas with ceilings over 260cm (8.5’) the sitting bench to ceiling height can and perhaps should be increased. A rule of thumb here might be for every 3cm extra ceiling height, raise the benches 2cm. Or for every 3” extra ceiling height raise the benches 2”.
For electric heated saunas this greater distance allows placing the thermostat sensor higher (except for the problems caused by UL over-regulation that we’ll get to later) relative to our head which results in less variation in temps at head height. Most heaters have a 10°c cycle swing – if set for 90°c then they’ll heat to 95°c and turn off until temps drop to 85°c, lather, rinse, repeat – resulting in an average of 90°c. This variation is greater higher up and lessor lower down so if the sensor is 10cm above your head then you experience perhaps a 7-8°c swing which is more comfortable. If 20cm above then you’ll have perhaps a 5°c swing. Increasing the ceiling to 130cm or even as much as 150cm (so long as the foot bench remains well above the stones & cold zone) above the sitting bench can result in more even and comfortable temps.
There are some trade-offs to consider. First priority is the foot bench above the cold zone and above the stones. Ideally about 20cm above the stones. Then 40cm (16”) to the sitting bench. If you can then do 120-125cm to the ceiling you’re good. A lower ceiling to sitting bench distance comes with a few negatives; Radiant heat from the ceiling can be uncomfortable, lessor distance can make it difficult to use a vihta and you can get hit in the face by hot air from the convective loop coming across the ceiling.
If you are forced to have a shorter ceiling (below about 250cm or 8’4″) then reducing this to as little as 112cm (44”) or even 100cm (40”) can be an OK option. In a small sauna (8x8x8.5 or less) you generally don’t want the sitting bench to be more than 120cm (48”) below the ceiling though there are some good exceptions; 1) an exceptionally tall group of people will be using it, 2) in a larger sauna where the convective loop will have traveled a greater distance and spread out more so some extra height keeps bathers from being slapped in the face by the heat, 3) if the ceiling is about 300cm (10’) or higher or 4) to get the thermostat sensor for an electric heater a bit higher.
“If you can step directly on to the foot bench it’s too low.”
The Foot Bench or Foot Platform is then 40-45cm (16-18”) below the sitting bench. This can however be as little as 25cm (10”) to help get this bench above the stones. I’ve been in two saunas that were about 100cm ceiling to sitting bench and then 25cm to the foot bench and they worked fairly well.
Below that then might be a stepping bench, steps, a walking or access platform or some combination of these.
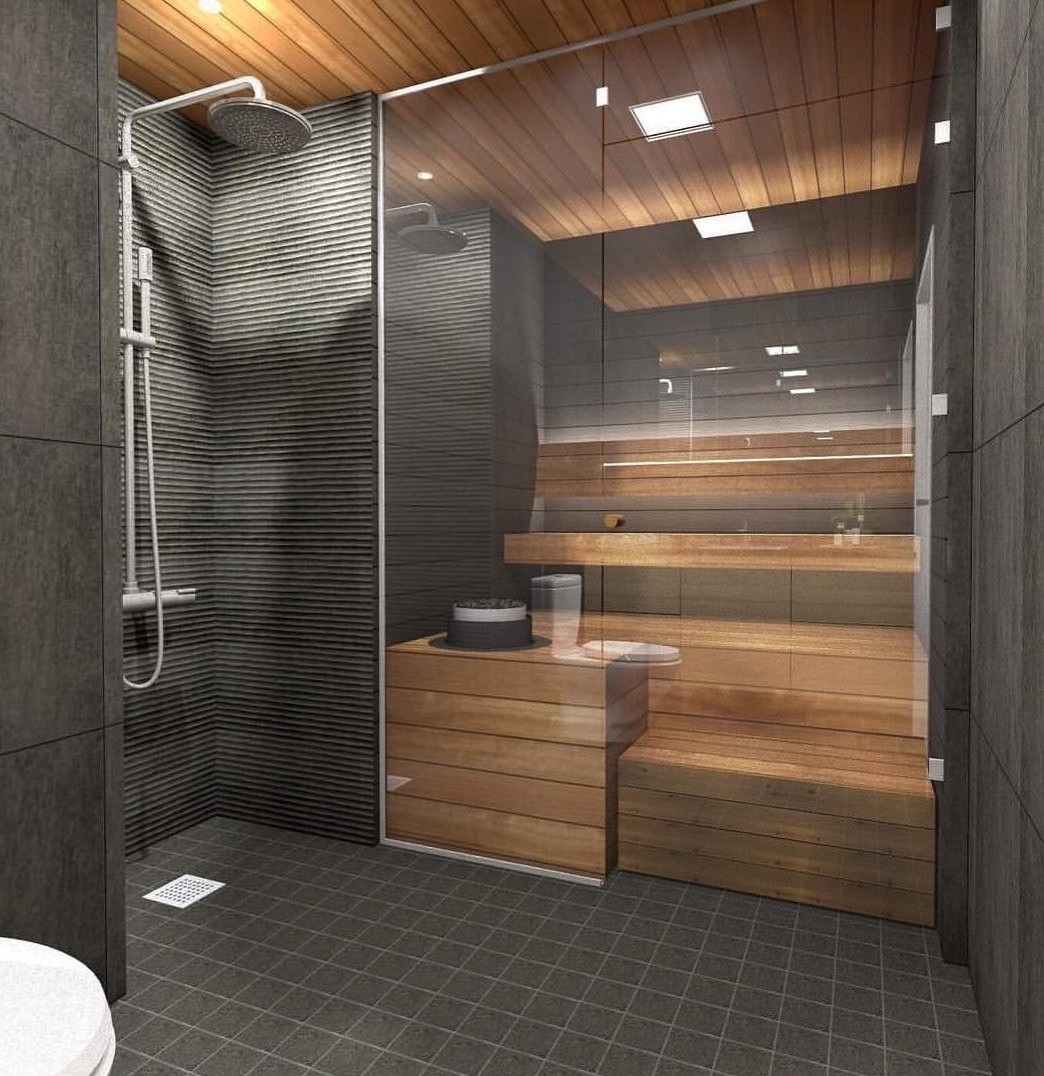 (Above: an ≈ 5’x6’x8.5’ sauna for 2 people. Even with such a tight space they got their foot platform about 34” high)
Following are five methods for determining the appropriate heights (if this seems confusing, here’s a hint – they all come up with about the same result in most cases):
Bench and Ceiling Heights Method 1: Traditional Finnish Method: ‘Feet Above The Stones’ – Traditionally, sauna builders in Finland have subscribed to ‘Feet Above The Stones’, known as the First Law of Löyly or Pälsi’s Law. They always try to get the foot bench ABOVE the top of the stones. And for very good reasons as this is where the better heat, steam and less stratification is.
This was originally noted by Sakari Pälsi in his 1961 book ’Sauna’, has been the standard for a few decades, and has been included in Finnish RT Specifications (guidance for building) for some decades.
Start by setting your foot bench above the stones, about 10cm (4”) above is good, more is better, and at least 85cm (34”) above the floor to avoid the cold zone – whichever is higher. Your sitting bench is then 40-45cm (16-18”) above that and your ceiling about 112 – 120cm (44-48”) above the sitting bench and you’re good to go. This applies equally to wood, electric and gas heated saunas.
Bench and Ceiling Heights Method 2: Top Down Shortcut – Start with the ceiling at 250-275cm (8.4 – 9′). This will get bathers above the cold zone. Set the sitting bench 112 – 120cm (44-48”) below that. Set the foot bench 40-45cm (16-18”) below that. Going down from there you can do another bench level or two, a platform, or a combination. So long as your foot bench is above the stones by a bit you’re pretty good. This is a basic starting point that many Finnish builders use. They might then raise the ceiling and benches if a larger heat cavity is desired, owner desires an taller open mesh pillar style heater or just to improve the sauna experience.
Bench and Ceiling Heights Method 3: 3 Benches – Some Finns will say to simply make sure to have 3 levels of benches; 45cm (18”) Step + 90cm (36”) Foot + 132-135cm (52-54”) Sitting. Then the ceiling 112 – 120cm (44-48”) above the sitting bench.
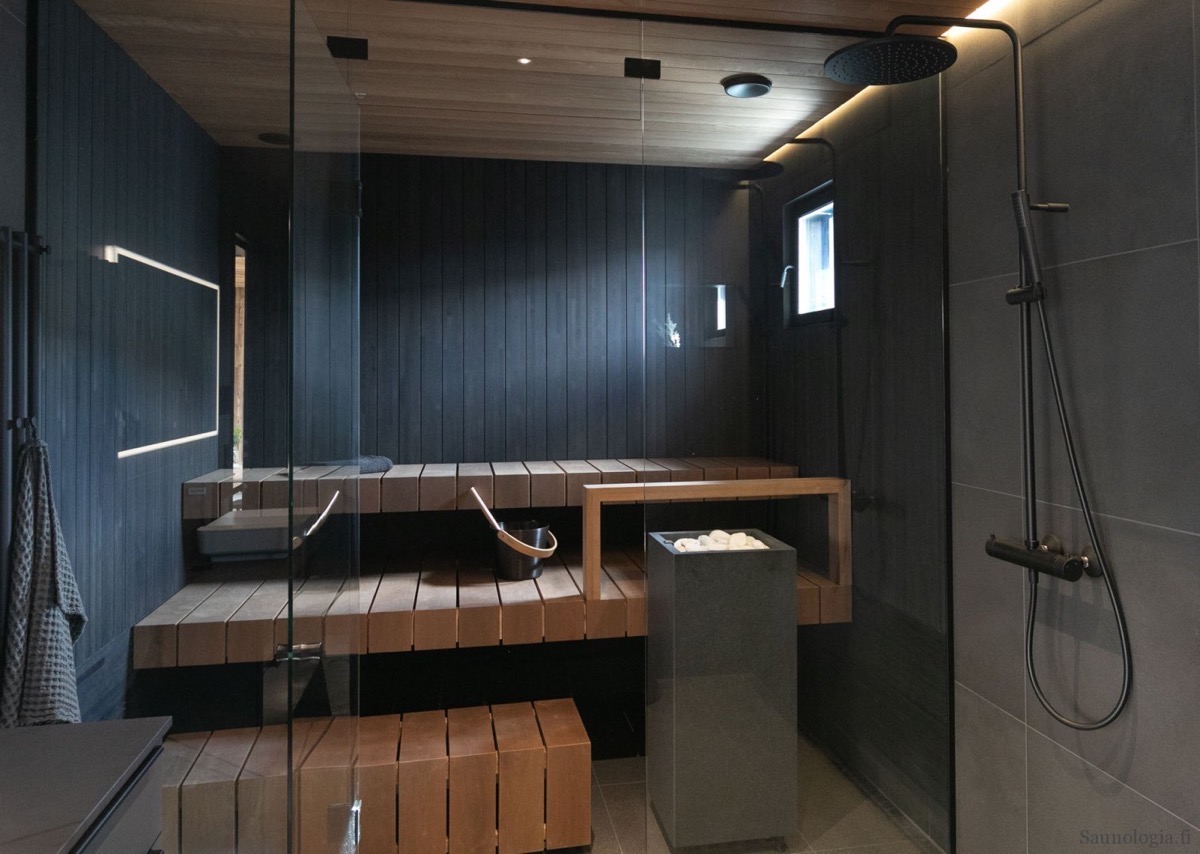 Above: 3 levels results in a 17” high step, 34” high foot bench and 50” high sitting bench.
Note that in many saunas in Finland and elsewhere the step or foot bench level is actually an air permeable platform covering the entire room. These saunas will appear to have about a 5-7’ ceiling (and it is 7’ from the platform) but in reality there’s another 18-40” or more of space below the platform and this space is critical as it is a key bit of the cold zone.
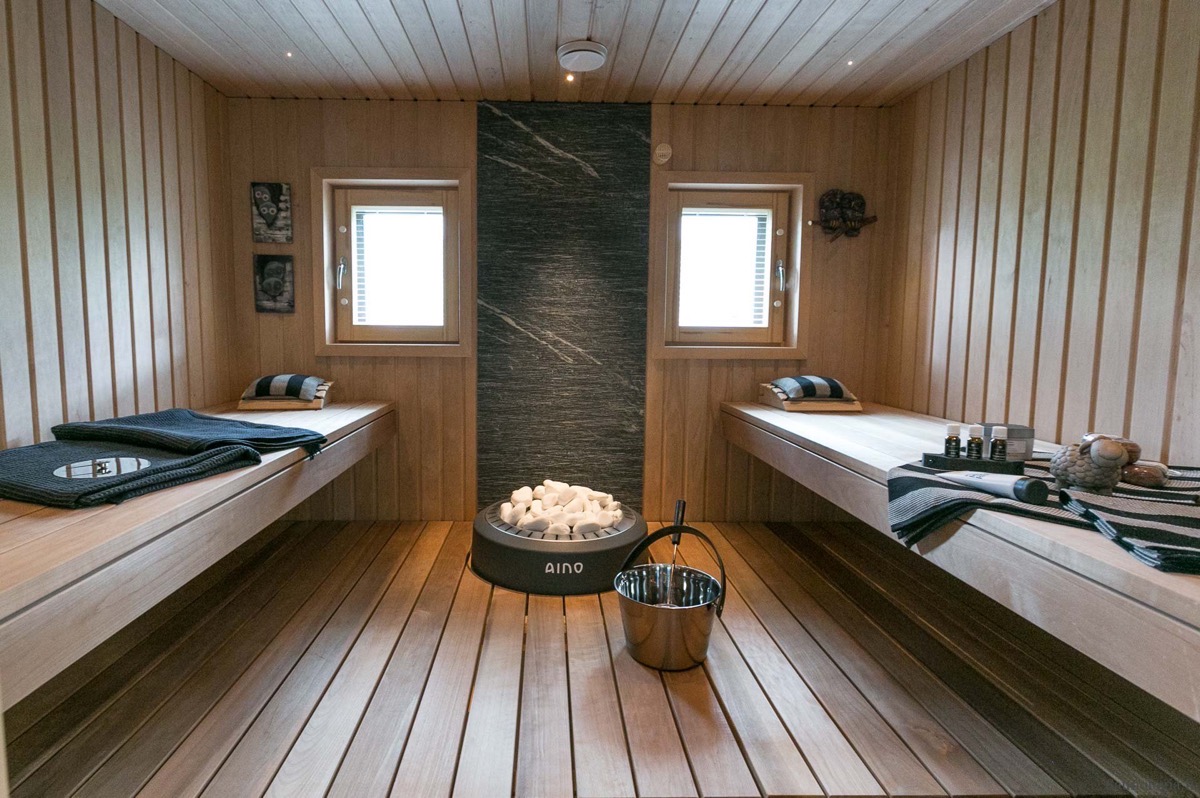 Above: There’s another 33” of cold zone space below the foot platform in this sauna. (Note also the fresh air supply for Mechanical Downdraft Ventilation in the ceiling above the heater).
Bench and Ceiling Heights Method 4: Mesh Shortcut – (Note: This is no longer recommended. It can result in good temps but steam still doesn’t generally go below some point above the top of the stones.) If you have a taller open sided mesh style heater such as an Iki or Helo Himalaya then a minimum target for the foot bench or foot platform is about 90cm (35”) plus half the distance to the top of the stones. So if you have a 48” high heater then the foot bench should be 35” + 7” = 42”. Higher is better, lower not so much.
There is however a bit more margin with these heaters. You can have lower benches, but at a cost. Bathers will experience more head to toe stratification but the difference for every inch you go down isn’t as great as with closed sided heaters so long as the benches have sufficient air gaps. Also keep in mind that you still want a sufficiently large heat cavity above the door so lowering your benches and ceiling also reduces that.
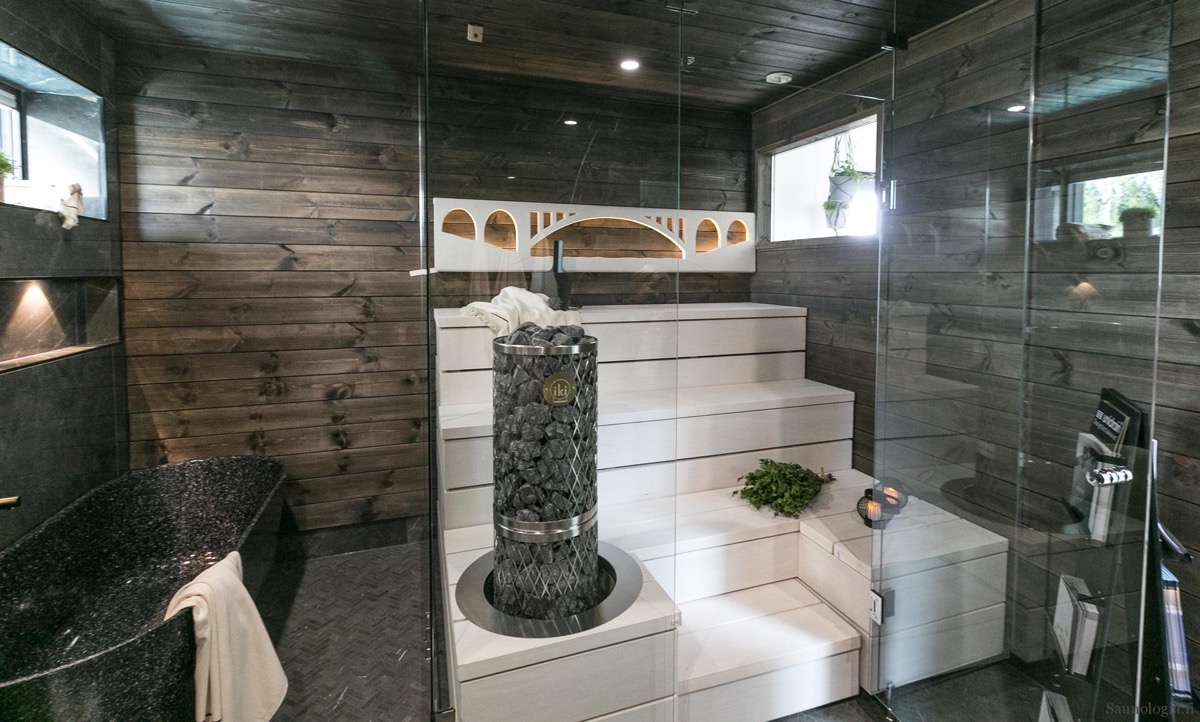 Above: a 9” step to an 18” platform to a 34” foot bench to a 50” sitting bench.
Bench and Ceiling Heights Method 5: A Bit Of Physics – Moved to 3. Sauna Dynamics.
For some valuable info on benches from Lassi: The Most Important Factors In Bench Design.
A low 7’ Ceiling Does Not Save Energy – The primary sources of energy loss in a sauna are; opening the door, overheating to avoid cold feet, poor insulation and poor air sealing. A higher ceiling is NOT a significant consumer of energy and thanks to a larger heat cavity often results in an decrease in wasted energy.
In a typical room where we sit near the floor and want to remain comfortable at body level then a higher ceiling requires considerable extra heat above our body to remain a comfortable temp at our body that is in the lower and cooler part of the room. A 7’ high ceiling needs to be about 70°f at the ceiling for our body to be 68°f but a 9’ ceiling will need to be much warmer, about 74°f, at the ceiling for that same 68°f temp where we are. That extra 4°f of heat will use more energy, cost more and result in not greater warmth for us – so wasted energy.
A sauna is quite different. Since we are keeping our body in the upper part of the space then any additional volume is added/subtracted lower down. Regardless of how high the ceiling is we still want the ceiling to be the same 100°c and we still have the same löyly cavity. Example: An 8’6” sauna costs $1.08 to heat initially and then $0.42/hr to maintain that temp (8’x8’, R-20 insulation, -4°c outside temp) so $1.92 for warm-up and 2 hrs of use. Lowering the ceiling to 7’ costs $1.02 to heat plus $0.40/hr for $1.82 or 10 cents less per session. And though much higher temps than our home, we are only heating a sauna for a portion of each day/month/year rather than constantly so energy use/cost will often not be an issue.
But there’s a more important bit. A higher ceiling gives us a larger heat cavity and less heat lost each time the door is opened. Depending on how often the door is opened and for how long this can, and in most cases will, make the higher ceiling with the larger heat cavity less expensive to heat than a lower ceiling. This is a key reason that commercial saunas often have the foot bench or walking platform above the top of the door – because it costs them less to heat (and keeps bathers more comfortable).
And one more. Some people who’ve installed proper ventilation in electric saunas with a supply above the heater and a mechanical powered exhaust below the foot bench discover that turning the exhaust blower up pulls more warm air down resulting in warmer feet and a more comfortable experience overall. This is good, but they are often ventilating at a much higher rate than necessary for ventilation itself and so are wasting heat that would not be wasted if their ceiling and foot bench were at proper heights allowing them to have the same comfort with less wasted heat.
Circulation Fans – There are three types; ducted, non-ducted, and heater. Ducted systems such as a Saunum or those used for what people in Finland call a Convection Sauna can work OK to reduce stratification. The result is not the same or as good as a proper sauna but if there is no option for a high enough ceiling or a need to serve people with limited mobility then these are an option.
Non-ducted are fans or blowers somewhere in the space blowing air around. These can be on the floor, mounted from the ceiling or elsewhere. These require too great of airflow which is not nearly as comfortable and enjoyable as a proper convective loop and in many cases is simply uncomfortable. These can also result in bathers getting very dry skin. So, generally not recommended.
Some heaters, such as SaunaSampo, have blowers built in to increase airflow up through the stones. These can help to strengthen the convective loop and sometimes will pull warmer air down a little so extending the löyly cavity a bit lower. These are tricky though, both to design properly and to incorporate properly in to a space for good results.
Reducing Energy Use – For the most energy efficient sauna:
- Insulate and Airseal Well
- Reduce Thermal Bridging
- Have a Large Heat Cavity:
- Low Door Height + Higher Ceiling
- Use a Sauna Curtain
- Have a vestibule/changing area as an air lock.
To preserve heat as well as possible, older saunas in Finland often had doors that were about 1m (40”) high by 1m (40”) wide. They wanted the top of the door to be below the stones, and bathers and so the foot bench to be above the stones and above the top of the door. This is still done today – saunas with a lot of people coming/going, particularly public saunas, will have the foot bench above the top of the door.
A sauna curtain hung in the doorway can be a good tool for preserving energy and steam. Be careful that it’s not too close to the heater though! Lassi Liikkanen has noted that they also work well for families with children who might want to open and close the door frequently.
Going Down To Go Up – If building codes limit your height, such as the 2.5m height limit in parts of the UK, then digging down to get the floor of your sauna lower may be a good solution. Ideally you want the entry door to also be lower to provide good heat cavity so one good option is to have a sunken patio or grotto outside of the sauna building. A sunken patio can also aid privacy (and personally I think these look very cool). If you do this, make sure to have good drainage.
Some builders in Finland will dig a pit in basements in order to fit a sauna in with the proper height.
If A Low Ceiling Can’t Be Avoided… There are two good options; 1) A Saunum or 2) A Convection Tube in an open sided heater.
The Saunum is a newer product designed specifically to help alleviate problems of stratification and cold feet in saunas that cannot have a proper 8.5’ or higher ceiling. It is designed based on the principles of a Convection Sauna built for people with disabilities.
If you are handy and enjoy engineering and tinkering you can possibly build something similar yourself. If you do, it may be worth experimenting also with airflow in the opposite direction; intake at the bottom and outlet at the top. Also, intake on the bench wall with outlet on the heater wall above the heater. And possibly include fresh ventilation air exchange along with this. Unlike the Saunum that works against the convective loop that creates the löyly cavity, this would work with that loop. One caveat – Andrus Vare and others at Saunum did considerable research to arrive at the current device that many Finns think works quite well.
Saunum Note: Saunum collected good data on both heat stratification and CO2 levels in saunas. On the latter noting that they often measured CO2 levels of greater than 2000 ppm which is in agreement with my earlier studies. They err in their solution to the CO2 problem though in stating that the Saunum increases O2 (Oxygen) levels for bathers. O2 and CO2 are not really connected. There is a massive amount of O2 in the air around us and in saunas, there is no need to increase O2 nor to re-distribute O2 in a sauna. The need is to remove CO2 – which the Saunum product does not do.
The primary complaint I’ve heard is that it produces some noise that some people do not like (and also where a custom solution might work well). I’ve also heard from some people in Finland that they find the noise acceptable or even pleasant with three people saying that it’s pleasant white noise and one that it’s created a better environment because he now can’t hear his kids. So if a really super quiet sauna is your thing then maybe not a Saunum, otherwise it shouldn’t be a problem.
A Convection Tube is a small duct that runs up the middle of the stone mass of an open sided heater. It pulls air in from the bottom of the stone mass and produces an enhanced convective loop that helps to lower the floor of the löyly cavity (decreases stratification and pulls steam down a tiny bit lower). The duct should be about 8 – 18cm (3-7”) diameter and run from bottom to top. At the bottom there needs to be a cavity or duct from the edge of the heater to the duct to provide airflow and this should face the benches.
This was originally posited and demonstrated by Sauna_Sitter (Reddit) with early experiments showing positive results.
A proper higher ceiling and benches are still the best option and provide the best bather experience but if a low ceiling can’t be avoided then one of these might be the next best alternative and produce a better experience than a circulating heater such as a Saunum.
“I Just Put My Feet Up” – Is a phrase heard often, particularly in North America. To avoid the cold feet problem when benches are too low people often put their feet up on the sitting bench. And this is totally fine (and I sometimes like to do this even in a good sauna). Some drawbacks are that this increases dirt and bacteria on the sitting bench, it’s not so good for blood circulation, it’s not comfortable for very long and sometimes it doesn’t work unless there are fewer people and more bench space. If the sauna is designed properly however, with proper high benches and ceiling, it’s not necessary and everyone can sit up straight like modern humans.
In barrels this is only marginally effective since the stratification from bathers heads to the sitting bench where they are putting their feet is often still greater than the 27% maximum that’s minimally acceptable.
Foot Rail or Foot Rest – A foot rail provides several benefits. It helps to protect people from accidentally falling off of a higher foot bench and particularly from falling on to or touching the heater. It also offers an alternative body position for us.
Critically, it provides a place for people to put their feet up higher. This is particularly welcomed in saunas that have cold feet (typically from too low of benches) and so allows people to get their feet and legs up in to the more even temps and steam of the löyly pocket. It’s a good idea for the top plates to be slanted slightly.
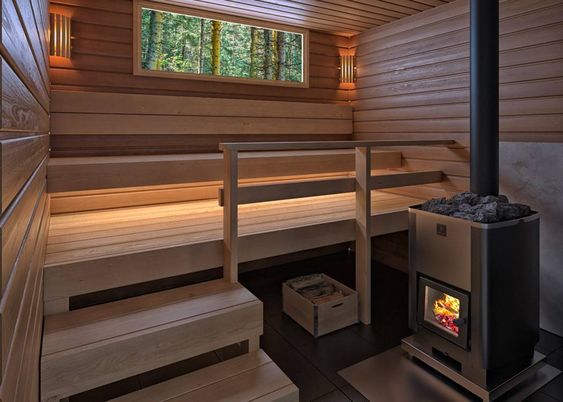 The foot rails in this sauna will allow bathers to get their feet and legs above the stones and above the cold zone to avoid cold feet.
This is not a replacement for proper bench height. Benches above the stones are still best (and foot rails here better still) and make for a more enjoyable sauna experience. Also, when steam is made, many or most people like to lean forward with their elbows on their knees. This is more comfortable for the first minute of steam as it settles across our backs which itself feels good but it also allows us to protect our face, which is much more sensitive, until the steam has evened out a bit.
Older folks or those with limited mobility may find it difficult or uncomfortable to pull their feet up on to the sitting bench or on to foot rails.
Bench to Bench Height – This is traditionally 45cm (18”) other than in a sauna. In a sauna however, reducing this to perhaps 40-42cm (16-17”) or even less has some advantages. It gets the foot bench higher which is always good but especially beneficial in a space that’s forced to have a ceiling lower than 8.4’. Shorter is more comfortable for many people and is especially more comfortable when you want to lean forward with your elbows on your knees. It makes for easier step ups for people. Ours are 18” but we have some 2” and 3” risers that people can pull out which is also an option though these could also be a trip hazard if not put away.
Bench Widths – In Europe the recommendation is 60cm (24”) of sitting bench AND foot bench per person. 26-30” may be more comfortable for some Americans. If a L shaped bench then a bit more so that the people in the inside corner don’t have their legs on top of each other. A good rule of thumb is to measure seating capacity along the front edge of the foot bench, not the sitting bench.
A Bench to Lay On – If possible at least one sitting bench should be 76-80” or more so that someone can comfortably lay down.
Bench Depth – 24-28” is the recommended minimum for the sitting bench as this is both comfortable for sitting and wide enough (24” is kind of tight) to lay down on. Lassi recommends as deep at 40” for the top sitting bench which is ideal if space allows. This places you out away from the wall so that your back is heated by löyly and not cooled by the wall.
Bench Layouts – The best is usually an I, or single row of benches along the bench wall. An L arrangement can work well but should be done only in a sauna that’s at least 275×275 (9’x9’).
Avoid Parallel or II and U Benches – In most cases. Firstly these should be done only in saunas that are at least 3m x 3m x 2.7m but even that is tight and can result in bathers being too close to the heater along with wonky heat and steam on bathers. Another issue is that many people are uncomfortable directly facing each other, especially when nude – I are best from this standpoint with L a close second.
Bench Slat Dimensions – My preference is roughly 1×4 nominal (7/8 x 3 1/4) or actual. These are thick enough to be structurally sound and the 3.25” width provides a comfortable seating surface with good air gaps. However, numerous other dimensions can work. Be careful of too thick though as that can result in taller gaps and too little airflow. Too wide can result in too few gaps and too little airflow. Whatever you choose, make sure that the top edges are rounded over.
Bench and Platform Air Gaps – Good air circulation throughout the hot room space is critical. The benches should interfere with airflow as little as possible. A minimum of about 1/6 of bench and platform surfaces should be evenly air permeable so a maximum of about a 1:5 air to wood gap. More air gap like 1:4 or 1:3 is better. Gaps should be wide enough for good air passage/circulation (minimum 3/8”) but not so wide (7/8” maximum?) as to be uncomfortable to sit or walk on. These gaps are important for cleaning as well. Too small of gaps cannot be easily cleaned and so after time can accumulate bacteria, mold and grit.
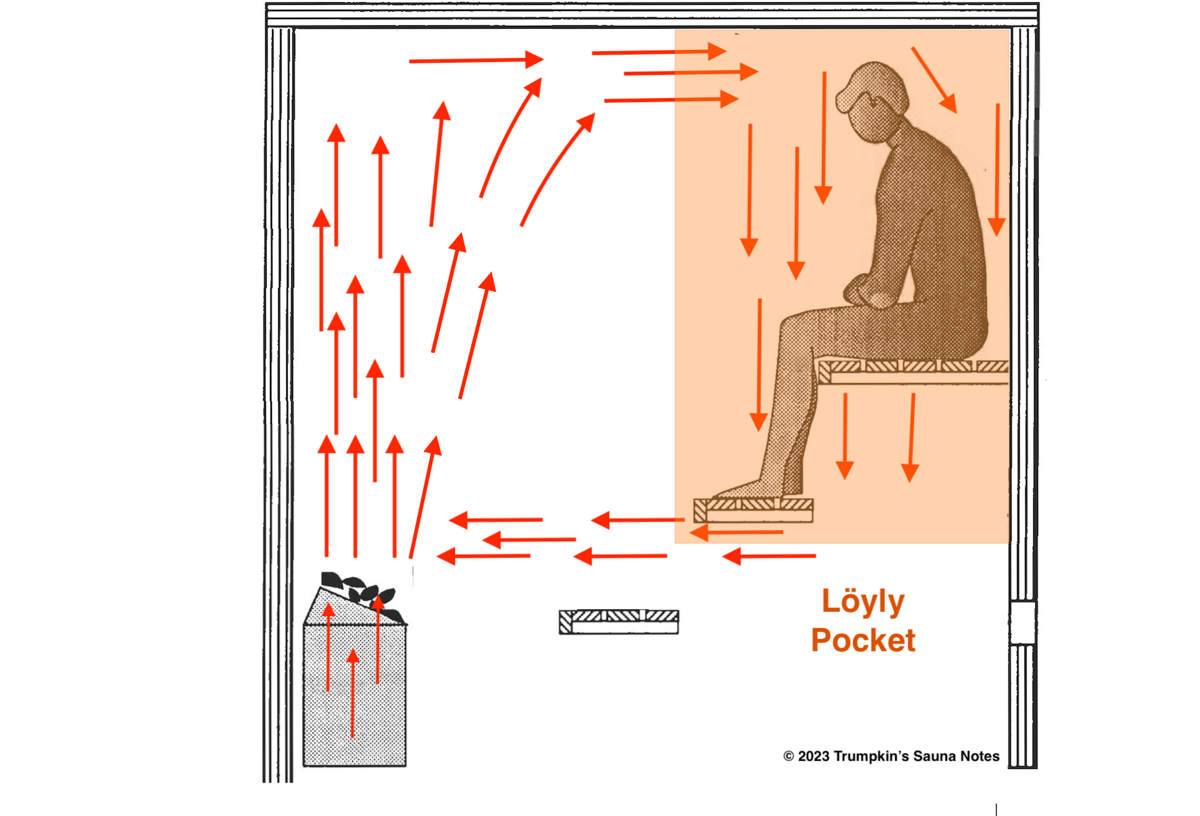 Good airflow through benches and skirts results in our being fully enveloped in even heat and steam.
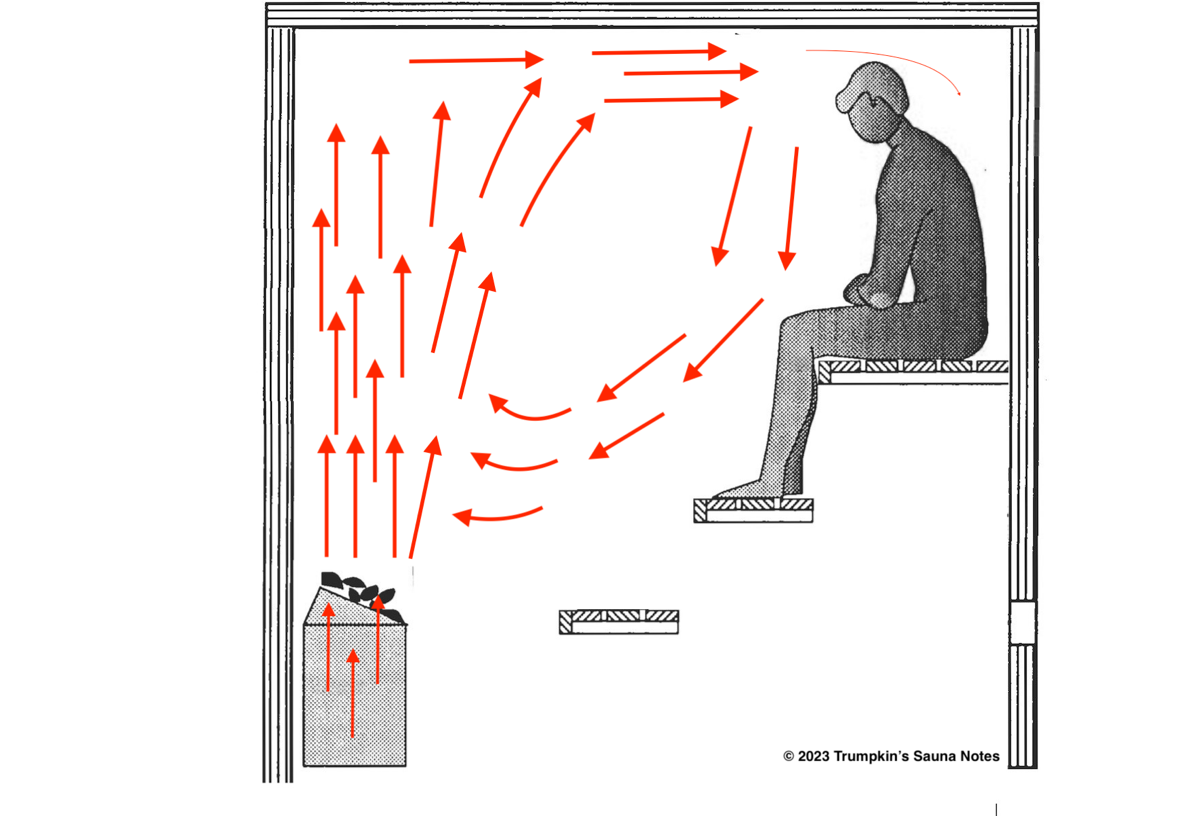 Insufficient air gaps results in less even heat and steam, cold feet and potentially a chilly back.
Too little air permeability interrupts the convective loop that forms the löyly cavity. It often causes it to shelve or bottom out at the sitting bench (image below and above) rather than reaching down to bathers legs and feet. This then results in less even heat on bathers bodies, cold feet and potential for increased mold and bacteria growth (Image below by by C Macqueron).
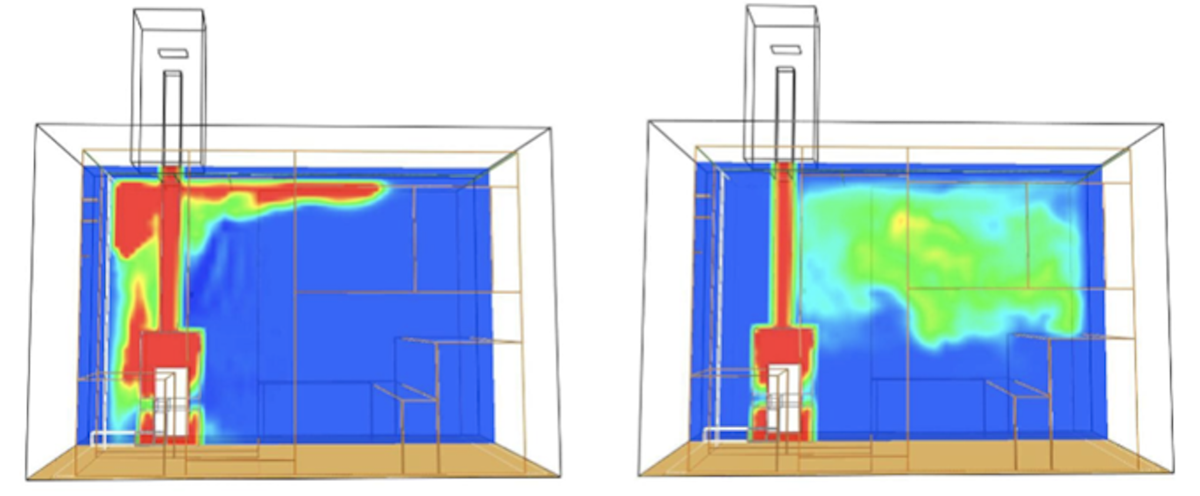 Image: Corentin Macqueron
This can also result in a total discombobulation of the convective loop in smaller saunas, if it cannot flow down freely on the bench side then it becomes turbulent and often results in heat and steam rising directly towards the bather and bathers face rather than descending down from above.
Sufficient gaps are needed also for the wood slats to dry. It’s easier for sweat to penetrate in to tiny gaps than for air to flow through enough to dry the wood.
A gap of about 3-5cm (1 – 2”) between the bench and bench wall is important, particularly for steam. When steam is made it hugs the bench wall (coanda effect) as it descends. If it encounters any hard surface it will bounce up and largely stay above the sitting bench, leaving our legs and feet dry and cold. This can also create a higher pressure area resulting in no steam to our lower back. This gap allows the steam to continue to flow downward so that our lower back and legs benefit from the heat of the steam.
Avoid Tall Gaps – Ideally you want the gaps between slats to be wider than they are tall. If the gap is significantly taller than it is wide then it can result in static pressure reducing airflow. This isn’t as important as overall bench heights and other things so if your heart is set on benches with milled 2×4’s set on end or some other design resulting in tall gaps then it’s not a huge loss but otherwise something to keep in mind as it will affect the experience.
Removable Benches – Building benches so that the bench or a portion is easily removable may be appreciated when cleaning time comes. It may be easier to take them outside for a good scrubbing than to do it with them in place. This especially if you don’t have a drain and want to do a really good annual scrubbing. This is doubly important if you want to give them a light sanding as this will save you cleaning up sanding dust (which I can tell you that you will rarely get fully cleaned up in a sauna). Lighter weight removable panels that sit in a stronger structural frame are a good option. FWIW, mine are not removable and I’ve not found it a problem.
Bench Skirts – It is generally best to not have skirts. Many people like to tuck their feet under the bench, especially if someone is sitting there, but most importantly, they impede airflow. If you include skirts then recessing them back several inches behind the front of the bench can be more comfortable for bathers. They should also be at least 30% permeable (1:3 air to wood) for airflow.
Access To The Benches – Can be via steps or a platform can be built 17-18” below the foot bench with steps up to it from the changing room floor. If room allows, three benches can be beneficial and especially if the middle of these, that is both a sitting bench itself and a foot bench for the highest bench, can be a bit extra deep like 26-30” to provide more comfort for feet and rumps. It’s critical that ALL benches and platforms be openly air permeable with sufficient gaps to the space below as otherwise you’ll have a higher cold zone.
Foot Bench vs Platform – Many saunas in Scandinavia do not really have a ‘foot bench’. Rather you go up 2 or 3 steps to a platform that is 90cm (35”) or more above the floor and then there are sitting benches around the platform. These benches need not be fixed in place and can even be individual chairs or loungers. In others you might go up a step or two to a 45cm (18”) high platform and then there will be foot benches around the platform with sitting benches above them.
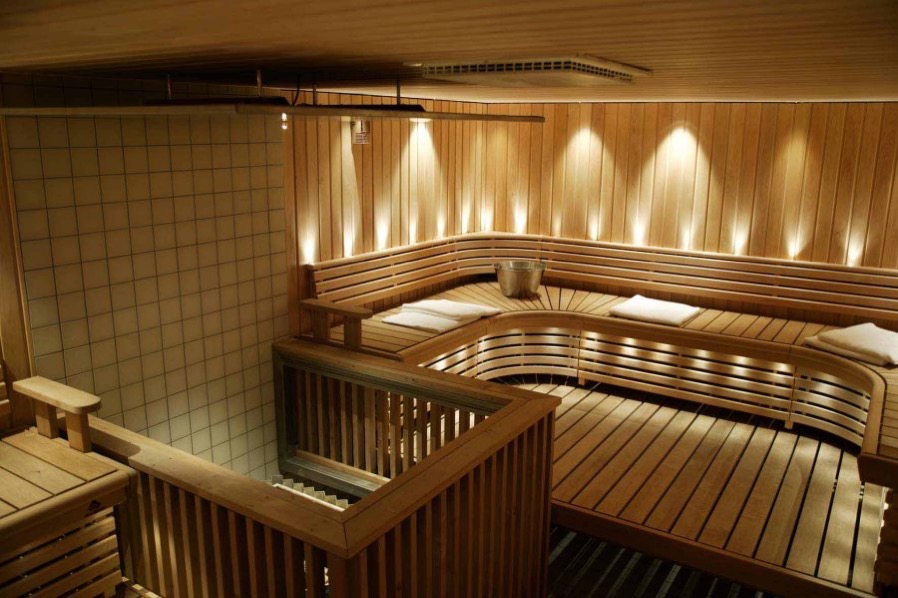 Above: you step up to a central platform and then on either side (one side shown) is a second platform a bit above the stones around which are the sitting benches. There is no real foot bench. (Note the fresh air supply in the ceiling).
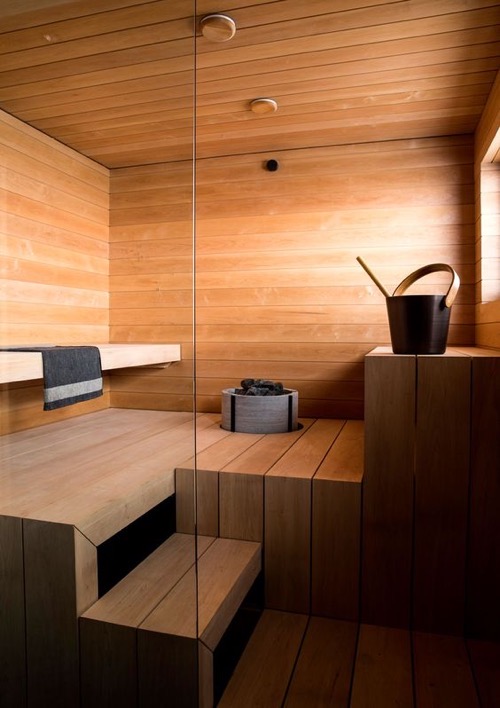
Chairs – It is also possible to do chairs, loungers or moveable benches rather than fixed benches. Build an air permeable platform at 90cm (36”) or higher and then rather than have built-in sitting benches you can have wood chairs such as those from Saunasella. FWIW, I don’t necessarily recommend this as it requires considerable space per person but could be a good option for some. This can make cleaning easier as well.
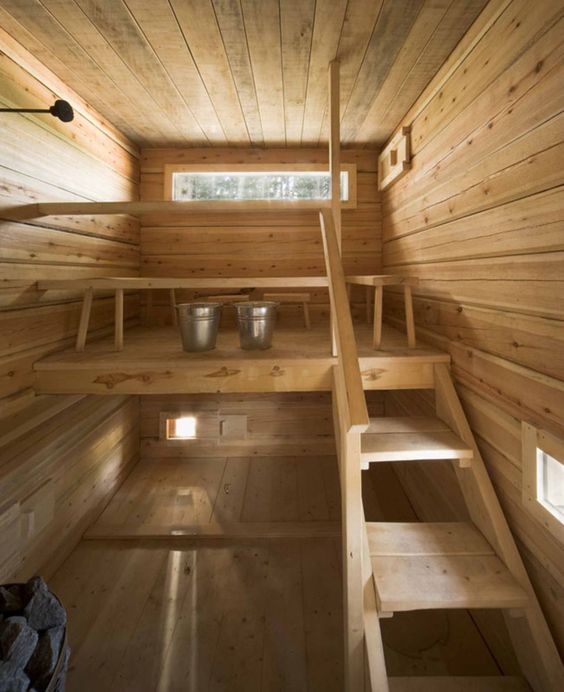 This sauna has moveable benches rather than fixed benches.
Mezzanine / Loft Sauna – It is not uncommon in Finland and Sweden for the hot room to have two levels. A lower level that is cooler and where the heater is located and then steps or a ladder up to the sauna mezzanine or loft level. The lower level may be just large enough to enter and access the steps but is often large enough for one or two people to bath standing up. Or, as in the second photo, comprises all ancillary space for changing, bathing and relaxing. The upper sauna level is an air permeable platform about 1-2m (40-80”) above the heater level with sitting benches on or around the platform.
This gets sauna bathers above the stones, above the cold zone and results in very little head to toe temperature difference thanks to the higher ceiling and benches so a ver enjoyable sauna experience. If the mezzanine is above the entry door such as these are then there is no critical need for a vestibule to act as an air lock and the overall height somewhat lessens how important some elements are such as ceiling shape and sitting bench to ceiling height.
Here’s an example of a typical family sauna in Finland.
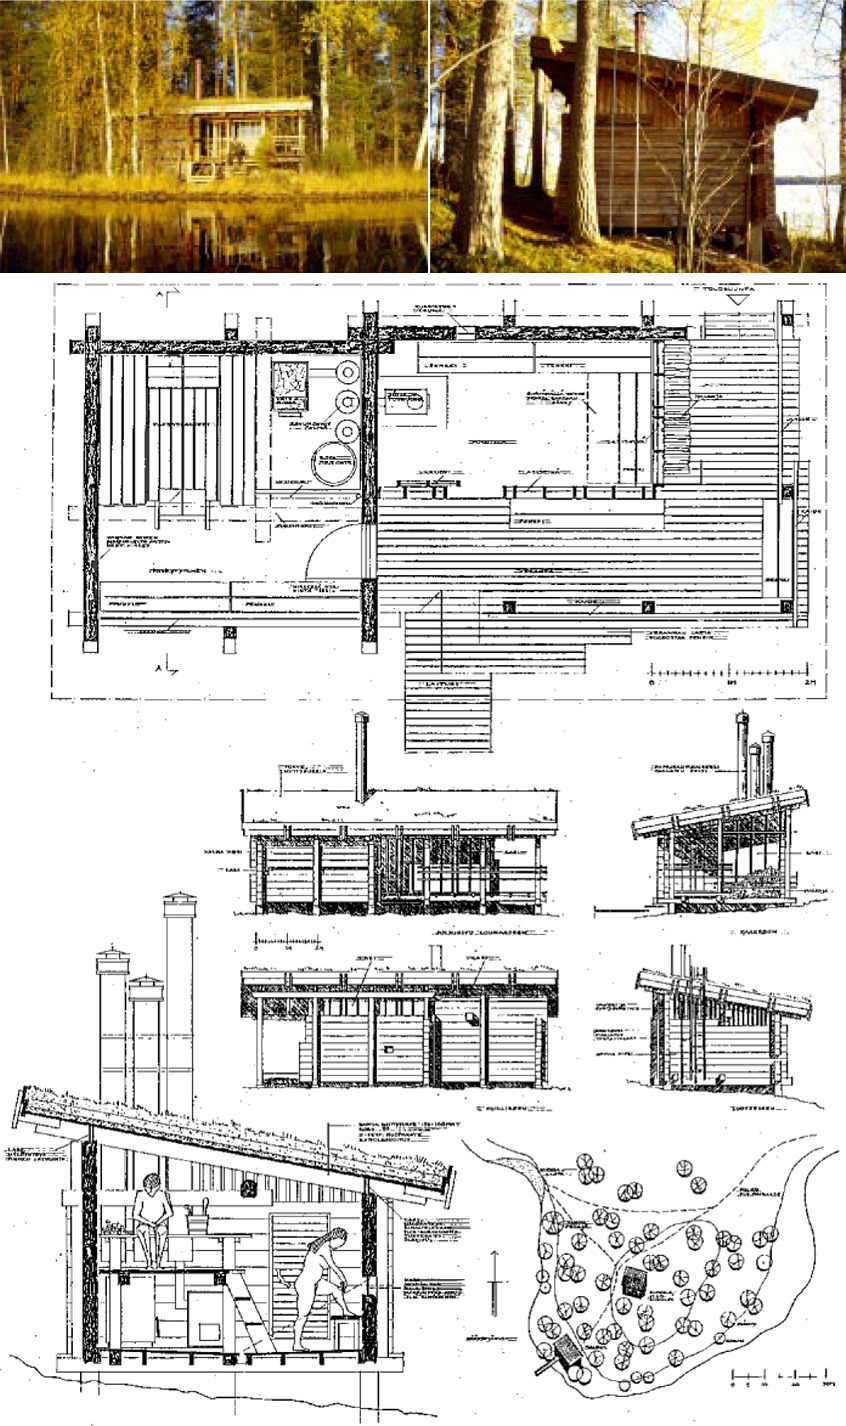 A not untypical family sauna in Finland.
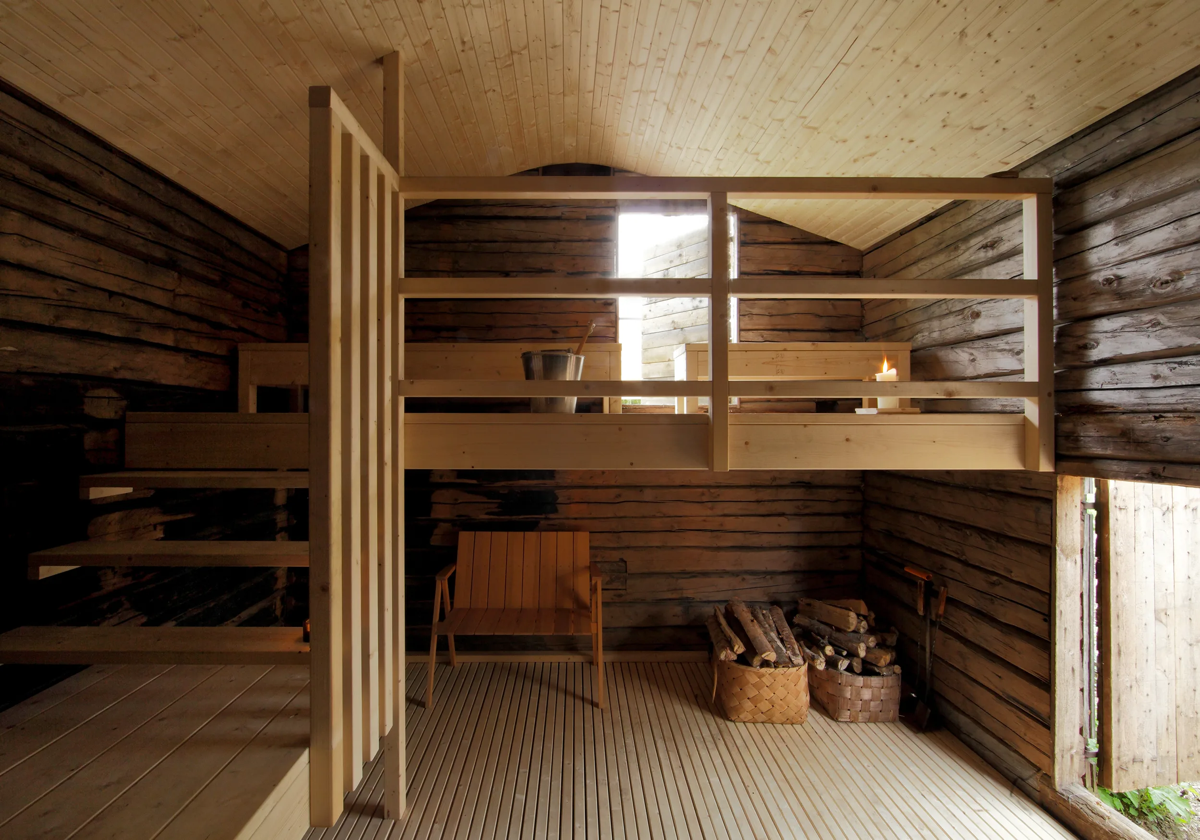 A sauna in Soini, Finland. The mezzanine door is not used during sauna except for someone with disabilities. The heater is to the viewers right. And yes, the main door on the right is quite short which is also not unusual as it helps create a larger heat cavity.
Large Heat Cavity Above The Door – Every time the door is opened some heat escapes and it’s the heat from the top of the door opening downward where this happens. Heat and steam that are above the door opening largely remain in the sauna (think of a cup of air inverted in a tub of water). In many saunas this is the greatest source of heat/energy loss.
The larger and higher the Heat Cavity the better. Being larger means that a larger volume of heat is retained within the sauna and a lessor percent is lost with each door opening. Being higher results in the hottest air being retained and cooler lost. Also, the higher the ceiling is above the door opening the less air pressure there is at the top of the door opening and so the less heat pushed out.
A 7’ sauna with a 6’6” door will lose a good bit of 190°f air while protecting only about 6% of the heat, while a 9’ sauna with the same 6’6” door will lose 181°f air, and less of it, while protecting 26% of the hottest air.
In practical terms bathers will feel less colder air directly, the overall sauna temp will decline less and the sauna will recover to proper temps sooner. Overall much less discomfort for bathers. This can help any sauna but the more people coming and going the more critical it is. So if you will have many guests then a 9’ or 10’ ceiling might be considered to allow for a larger heat cavity. Keep in mind that if you raise your ceiling for a larger heat cavity then you need to also raise your benches. The sitting bench should always be within 100-120cm (40-48”) of the ceiling and the foot bench no more than 18” below. Besides the larger heat cavity this will also reduce head to toe stratification so is overall not a bad thing.
A sauna curtain in the doorway is also an option for creating a larger heat cavity.
In saunas that will have many people coming and going, such as public saunas, a builder will try to have the foot bench and often the platform in the heat cavity above the top of the door (so a platform at about 6’6” or higher and ceiling at 12+’ vs changing room floor). This can also allow for a door directly to outside since bathers are fully in the heat cavity and so protected from cold air entering when the door is opened.
Sauna Door – The wider and in particular the higher the door opening the more heat that escapes each time the door is opened. Height is most important as this determines the size of the heat cavity. A 6’-4” door opening can often work quite well. Shorter would be better but to preserve people’s heads it’s best here to go short enough so that it is noticeably different so perhaps 5’-6” or less. Doors of 4-5’ aren’t unusual in Saunas in Finland as they result in such a larger heat cavity. While a 22” width works well for a 6’-4” door, a shorter door needs a bit more width.
The door should seal relatively well (wood on wood is fine) so barn doors and other non swinging doors are often a poor option.
Door Opens Out and Is Unable To Be Latched – This is primarily a safety thing. Anyone in the sauna hot room needs to be able to exit quickly and easily at any time with a simple push on the door. There should never be anything that can accidentally block the door (such as the door to outside from the changing room) nor should there be any type of latch that can accidentally be latched or as a prank. Similarly a sliding door can be too difficult to open in an emergency.
Cognitive and motor abilities can decline quickly and suddenly with heat stress and this especially if CO2 levels are high from poor ventilation. This can make any effort beyond simple pushing difficult or impossible. 40-50% of sauna deaths (which are quite rare but still 40-60 per year in Finland) are alcohol related with falling asleep in sauna the number one cause. One person told me that being unable to exit is the cause of some deaths every year which baffles her because she said it’s difficult to find such saunas in Finland as they are all made with easy exit for safety. Someone could also die from CO2 poisoning in an unheated sauna with poor ventilation if they are accidentally locked in.
Door Window – It’s good to be able to see if anyone is on the other side before opening.
Wood – The use of wood is functional more than aesthetic. Wood is hygroscopic which helps to even out temp and humidity extremes to provide a more comfortable experience. Some woods such as Abachi, may remain cooler to the touch, and importantly, softer woods absorb some noise to make for a quieter and more peaceful environment. Ideally you want at least 90% of the wall surface area and at least perhaps 65% of each individual wall to be soft wood. As well, all of the ceiling and benches should be soft wood. However, if you’ve a really really great view then it may be worth it to sacrifice some wood surface for more window.
The functional aspects of wood are of increasing importance the higher in the space they are and particularly from just below the foot bench to the ceiling. So, if you’re building a sauna in an old building with great looking old brick that you want to leave exposed (I would) then doing this in the lower portion like the lower quarter of the sauna and keeping the upper 3/4’s all wood is the better option. And this is also generally better aesthetically as heavier materials (brick, stone, steel) look more natural below lighter (wood) materials than they do above them.
Almost any wood can be used though some are somewhat better than others. Softer woods are better than harder woods so you want the majority to be softer. Mixing for aesthetics works well though keep in mind that different woods expand/contract at different rates so always allow for that. Avoid using woods that get hot in places with a lot of skin contact.
Spruce, Fir, Pine, Alder and Aspen are the most popular in Finland, Sweden and elsewhere. True Nordic White Spruce such as that from Koskisen is the primary wood choice in Finland. North American Spruce is likely a close second. Lassi used Monterey Pine (Pinus Radiata) for the ceiling of his new sauna which is certainly a good recommendation for that.
Heat treated wood such as Thermory is a good option. For some more interesting wall treatments there’s EmotionWood.
Be careful of woods with too much sap, resin or knots, especially for benches, platforms and backrests, as a knot with sap or pitch can get hotter to touch than surrounding wood, knots can pop out with hot/cold cycles and sap dripping from the ceiling isn’t too desirable. Clear select grade pine can work well so don’t totally rule pine out and knots without sap are often not a problem. Be cautious of differences in woods based on geography or common names.
Abachi, Alder, Aspen and Linden/Basswood are good options for benches as they remain a bit cooler than some other woods.
Some matching soft wood in the changing/common area can help to reduce noise and echo.
A good discussion on wood: Why Nordic White Spruce.
Cedar – Popular in the U.S. but you’ll not see it used for saunas in Finland, Sweden or other European countries. Cedar can be too fragrant for many people and for a few it’s a direct respiratory or skin irritant. Personally I like the smell of cedar but find that in a sauna it detracts from the sauna experience. Cedar can also conflict with other oils/fragrances. With cedar that’s the smell you’ll always have. With low fragrant woods you can freely use whatever you want (Eucalyptus seems overwhelmingly the most popular though my preference is a mix of tar and smoke sauna).
Contrary to popular belief, mold and bacteria do grow in cedar. The only way that I know of to control/kill mold and bacteria is heat – 65°c for at least 20 minutes.
Toping the list of negatives is potential toxicity. The primary concern is the chemical Thujone which is a neurotoxin and possibly a carcinogen. A secondary concern is Cadinene. When you walk in to a cedar closet or cedar sauna and ‘smell the cedar’ you are breathing in Thujone and Cadinene. The big question is one of dose. Are you breathing in enough over time to cause health problems? In my limited research the answer for us and our sauna is more than likely. Spruce was a much better and safer choice for us.
Cedar wood and cedar oil are used for storage closets and chests because they are an insecticide and repel many animals including insects. While cedar dust is one of the more toxic in woodworking (and one that comes with numerous warnings to always wear a good respirator), I do not know how this plays out as an aerosol in a hot sauna. There is speculation/evidence that cedar, yew or hemlock in a sauna may contribute to eczema flareups and other skin irritations.
Neurotoxins and carcinogens like these are often very slow acting and build up in our bodies slowly over time – dose. It can take years or decades for the harmful effects to become apparent as cancer, respiratory disease or other ailments. So be cautious of anyone who says that they’ve used a cedar sauna for years with no ill effects. They do not and cannot know that. They can only say that so far they’ve not noticed any apparent ill effects.
Perhaps the primary reason that you don’t see cedar used in Finland is that it doesn’t grow there. However, some Finns and Swedes have commented ‘why would you want to use something with such strong smell in a sauna?’ Finland uses a lot of imported wood for sauna building such as radiata pine from New Zealand. Cedar has been and still can be imported but people simply don’t like it.
Note that some ‘cedar’ products such as fence posts and pickets are actually made from Juniper which may be more toxic to humans than cedar. It’s also important to understand that in the U.S. the term ‘cedar’ is frequently misused (just like the term ‘sauna’ is). There are many woods called ‘cedar’ that are not and some types of cedar that are not called cedar.
Finally, sauna is a social activity. While you may prefer cedar for yourself, your guests may not like the smell or may be allergic to it. A neutral wood like spruce or pine is safer.
Personally I would avoid cedar. For me the negatives more than outweigh any benefits. If you want to use it I would suggest doing some more research first. It may be a totally OK option for you, or not.
Board Size – 1” x 4” nominal (0.75” x 3.5” actual) is generally considered a good size for interior cladding. Wider, such as 1” x 6”, or thinner can usually work OK in warmer climates or indoors but can cup in colder climates. This can be quite climate dependent so talking to a local woodworker who knows how various woods respond in your climate might be worthwhile.
Why Tongue & Groove – The wood in a sauna experiences a lot of temperature, moisture and pressure extremes over short periods of time which can make it want to move and warp. Tongue & Groove helps to stabilize the boards to reduce this. Shiplap and other joinery can be used but may come with a higher risk of warping.
Groove Down – With T&G walls the tongue should face up and the groove down to avoid moisture, water or sweat collecting in the grooves. Similarly shiplap should always be oriented so that the top board overlaps the board below it on the interior to help prevent moisture from creeping back behind. T&G is a better option as the interlocking helps to keep everything straight.
Pin One Side Only – Wood expands and contracts across its grain. With T&G cladding it’s best to pin or nail only one side, typically the tongue side. This allows the wood to expand and contract naturally without splitting.
Horizontal vs Vertical Interior Cladding – Vertical can result in moisture creeping around the boards and getting trapped behind. With a proper air gap this is not likely to be a huge problem (vertical is somewhat popular in Finland and this doesn’t seem to be a problem) but it can be. Horizontal T&G or Shiplap done properly should avoid this though.
It Gets Hot – Be careful of any metals, woods or other materials that get hot easily as getting burned on these can be less than pleasant.
Avoid plastic, vinyl, PVC, treated lumber, spray foam insulation or similar materials – When heated to sauna temps they can give off noxious gasses and worse these are often odorless so you do not realize you are breathing anything noxious. They may be OK in limited quantity outside of the vapor barrier (and insulation). The goal of sauna is to be enjoyable, not to get cancer.
Be careful of Glues and Binders. These can produce unhealthy and unappealing fumes when heated. Glues and products such as OSB or Plywood should be avoided or minimized (though OSB sheathing that is on the outside of the vapor barrier and insulation is fine).
Floor – The floor can affect the overall sauna environment. Concrete for example sucks heat out and increases stratification so generally is not such a good solution. A heated concrete floor works very well however.
In order of best to worst options:
- Best: Heated Concrete/Tile. Typically boiler fed hydronic though electric can work. This also works well to keep the space heated and avoid freezing. Comes with increased energy costs though.
- Wood Frame + Wood Flooring + Linear Drain. Effective, easy to build, no increased energy costs.
- Interior Concrete/Tile.
- Isolated Concrete/Tile.
- Unheated Concrete/Tile.
Indoor: A concrete floor as part of a larger house is not as big a negative as in a standalone structure. Heated is still better though. The floor can be bare cement or tile. Often there is no need for anything decorative as it will often have platforms or wood slat duckboards over it. Tile is certainly fine as well but make sure it’s not slippery when wet. Bare cement should be sealed for easier cleaning.
Exterior: For exterior sauna buildings a wood floor frame and finish are usually best. Concrete or tile result in significant heat loss and increased stratification so are best avoided unless the concrete is heated. A wood framed floor results in about 5-10°c higher temps at the foot bench (36” above the floor) vs concrete or tile. That’s significant. Tile can be slipperier when colder and especially if it gets ice on it. Tile can also crack from the hot/cold cycles it’s more likely to see in a smaller outbuilding.
Lassi’s Floor: Log sauna floor solutions and sauna experience.
If using unheated concrete/tile then raising the ceiling and benches an extra 10-20cm above the cold zone can sometimes overcome the stratification loss.
But but… Old saunas in Finland have open floors with gaps between the floorboards! Yes, but these also have much higher benches and often a mezzanine platform. So the open floor increases stratification by 10°c but the higher benches result in a decrease of 10°c.
A good alternative for an exterior sauna building is a concrete floor with hydronic heat. This can keep the floor warm enough to avoid the extra stratification that concrete normally causes, provide heat to the space, keep pipes from freezing and tiles from cracking, help to keep the interior drier between uses, AND is very comfy for bare feet in winter!
A thought from Lassi… For people who suffer from Vertigo, darker floors might be a good idea as lighter can exaggerate the feeling of being higher up. Neither of us have ever encountered any problems with anyone having vertigo in a sauna other than one Reddit post so this appears to be quite rare but for people who suffer from it this could help.
Some more excellent info from Lassi: Sauna Floor Solutions.
Floor Drain – A floor drain is highly recommended and some say is critical. My personal opinion is that it is definitely very good to have but not extremely critical. The presence or absence will not affect the normal sauna experience in any way. Having a drain makes cleaning easier since you can just hose everything down. If you want to be able to wash in the sauna, throw a LOT of water on the walls and benches or have a cute Finnish singer pour a bucket of cold/ice water over your head (if you’ve never tried this, you should) then a drain is more critical.
For a plumbed drain… It may be helpful to see if your drain can be run to a nearby drain before the trap. A trap filled with water is necessary to prevent sewer gases, primarily methane, from entering. If a drain is not used enough (which can happen with drains in saunas) then the water in the trap can evaporate and allow sewer gases to pass. Running to a nearby drain that is used more often helps to eliminate this. Being able to do this depends on local building codes and some practical bits of whether it will work properly or not. Otherwise, make sure that your sauna drain gets enough water in it to keep the trap full. This may require occasionally pouring a bucket of water in it.
For a sauna adjacent to a bathroom or shower it’s also possible to slope the floor so that water runs in to the adjacent space and drains from there.
For an outdoor sauna the drain can usually just drip to the ground. A pit of gravel can be a good idea if mud is a concern. You may need to consider keeping bugs and critters out so an easily accessible/cleanable filter is an advisable addition in some environments.
Trough/Linear Drain – A trough or linear drain can work better and make construction much easier than a central drain. The floor remains flat but slightly slopes towards the drain. Here’s one partially constructed (more details here).
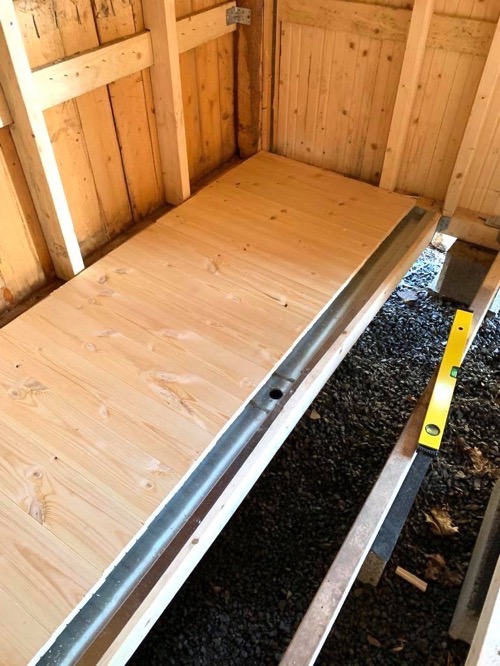
Note that this works well for concrete/tile as well as wood. With concrete/tile the geometry is the same as for wood – two flat surfaces slightly sloped towards the drain. This is much easier for us novices to build correctly compared to the compound slopes of a central drain, is easier to tile (no strange triangle cuts), easier to make duck boards for that don’t rock, more comfortable to walk on and is more robust and works better.
Warm Dry Floor – Stepping on to a cold or cold and wet floor while still in a hot room doesn’t make for a pleasant experience. A wood slat floor (duckboards) makes for a more enjoyable end to each sauna round. They will also help to keep benches cleaner as debris on the bottom of feet are more likely to remain on the boards or fall through them vs a hard floor where debris are more likely to stay on feet to then be deposited on to the foot bench. Duckboards actually seemed somewhat rare in Europe as many saunas include a higher platform that you step up to immediately upon entering.
Heated Floors – If you have a concrete floor then adding in-floor heat (preferably hydronic but electric can work) can make for a more comfortable experience, especially in the changing room and shower but also in the hot room. This can also improve warm-up time and will help to keep the wood drier between uses. This is a good idea for inside saunas and largely a requirement for an exterior sauna building with a concrete floor that will otherwise suck heat out and increase stratification.
Extending this to the porch and nearby walks or patios (snow melt system) isn’t a bad idea either.
Plumbing For Cold Weather – Plumbing an exterior building for winter (e.g., for an indoor shower, etc.) can be tricky. The least expensive solution is to turn off the water and fully or partially drain the pipes anytime they might freeze. Another option is heat tape and insulation on the pipes. This can be used throughout cold seasons or only during shoulder seasons and then plumbing turned off for deep winter. In some climates a circulation pump might be sufficient or a circ pump combined with a small heater or heater tape to keep the water and valves from freezing.
Finally, there’s the option to have a climatized building with hydronic heated concrete floors.
Hygiene requires higher temps – It’s critical that after a sauna has completed its duties for the day that heat is used to kill bacteria and mold. The sauna should be able to maintain a minimum of +65°c ( +149°f) at the foot and sitting benches for a period of 15-20 minutes after use and after excess moisture has been exhausted.
Bacteria thrive in temps between about 4°c and 70°c (40-160°f). Mold between -5°c and 40-55°c. A sauna is an ideal breeding ground for both. Once bacteria or mold gets a start in a sauna the only options to get rid of it is heat or removal of the material. Chemicals, which you never want to use in a sauna anyway, have too large of particles to penetrate to the roots of mold or home base of bacteria.
It’s also important to note that not all molds and bacteria are unhealthy and there’s actually a problem in the U.S. of people not being exposed to enough organisms resulting in poor immune systems, but that’s a much deeper topic for another day.
For more: About the Hygiene of Sauna
Thermostat Placement – Normally the thermostat sensor should be placed on the bench wall about 1m (39”) above the sitting bench and about 20-30cm (8-12”) from the corner. This results in the most accurate temps and most comfortable and enjoyable sauna. Note that the sensor should not be closer to the ceiling than about 7cm (3”).
Many people In North America, to get higher temps, place the thermostat lower on the heater wall. This though results in wider high/low temperature swings which are uncomfortable and does not provide accurate temp readings.
These both may violate UL and manufacturer guidelines though which may be problematic. I recommend installing two thermostat sensor cables; one to the UL location specified in the manual and one to a proper location on the bench wall.
Another solution is to take a page from the heater manufacturers and use fresh cool supply air to cool the thermostat sensor just as they use it to cool the high limit sensor. This gets tricky though so considerable care is involved.
UL Labs: Promoting Unhealthy Sauna Since 1977 – In the U.S. (and I believe parts of Canada) UL Labs states that the thermostat should be placed directly over the heater, 4-6” below the ceiling and that temps at the thermostat be limited to 90°c for electric heated saunas. This recommendation results in three problems;
1) Actual temps for bathers, at their heads and shoulders, are then only about 60-80°c which is well below the 85-105°c temps recommended by the Finnish and Int’l Sauna Societies.
2) Most critically this results in too low of temps at the foot bench for good hygiene. Higher temps are needed to kill bacteria and prevent mold growth and UL labs restrictions prevent this.
3) To get around this many people in areas under UL requirements place thermostat sensors lower in the sauna (taking advantage of heat stratification) so that the sauna can reach proper temps. Because the thermostat sensor is lower it does not see the wider temp swings higher up at bathers heads and it cools off more and faster when the door is opened. This results in the heater over-correcting so bathers experience much greater temperature swings than they should. So if users desired 96°c it may spike up to 109°c for a bit and then slowly come back down.
As well, UL may be requiring sauna heater manufacturers to include a high limit temperature switch on their heaters with a very low high temp limit (mine appears to be 350°f). This results in a couple of problems;
1) Heater manufacturers appear to be requiring a low fresh air supply vent in order to cool the HL probe in order to prevent trips. This low vent results in poor ventilation for bathers and so high levels of CO2 in U.S. saunas.
2) It is somewhat common for people in the U.S. to separate the HL sensor from the heater to prevent constant trips. If the HL probe and switch is needed from an engineering standpoint rather than just to meet a UL requirement then this could be problematic.
3) On hotter days it may be impossible to cool the HL sensor enough to avoid trips since the air used to cool it may be over 100°f.
UL’s requirements do not appear to align with those of other countries and like new wine in old wineskins may be doing more harm than good.
Huum heaters appear to not have these problems as they are apparently imported and sold under a different classification than sauna heaters in order to get around these issues.
Stones & Heaters
Sauna Heaters and Stones is HERE.
The heater and stones are the heart of a sauna and choosing the right heater makes a significant difference in the sauna experience.
Ventilation
“Löyly is the Purity, Temperature and Moisture Content of the air contained inside the sauna as well as its thermal radiation.”
– 1988 Finnish paper on sauna health benefits
“Steam added to bad stale air is just that, steam added to bad stale air, not löyly..”
– 2020 Trumpkin’s Sauna Notes
Proper ventilation in a sauna is critical and discussed in: Proper Ventilation For Saunas.
Other Thoughts
Location – Sauna, More Than Just The Hot Room – Going to sauna is not just sitting in the hot room and sweating. That’s actually a rather minor part of the overall experience. Sauna is about hot/cold/hot/cold/hot/cold. Cooling off, relaxing and rinsing are each just as important an element of each round as sweating and appropriate spaces for these provided.
As well, the sauna space, be it a dedicated building or space within a house or other building, should be a space that you enjoy and want to spend time.
A sauna should be located where bathers can quickly and easily cool off each round. Ideally with a shower in an adjacent changing room and a convenient door to outside. Being able to go outside each round if possible is adds immensely to the overall experience.
I recently spent some time in the sauna at La Perla in Corvara Italy with some Germans, Swedes and an Italian. Everyone thought the sauna itself was good (though needed better ventilation) but all agreed that the lack of an area outside to cool off between rounds severely diminished the experience. We could see out the windows in the pool area to the wonderful cool air outside but there was no way to get there.
Social aspects and being able to invite friends to join in is important so a sauna located somewhere other than a master bathroom is good. Friends joining us for a few sauna rounds is a key element of the enjoyment of sauna and for those focused on wellness is a key element of that.
A separate sauna building with proper sitting, changing and shower facilities can be quite nice. Just as going to a cabin allows us to escape being at home and the distractions that come with that, a separate sauna building does the same. This even if the sauna building …is at our cabin. A separate building allows us to have a sauna-frame-of-mind and so relax and enjoy it more. We’re away from any distractions and stress in our home or cabin.
A sauna in a bathroom is fine and can work well but can sometimes be a long trek to outside and perhaps not the best social space for friends. A sauna with an adjacent changing room and shower in a lower level walkout might be better. Below is one way that a Finnish builder will include a very small sauna (red square, sauna interior is 6′-4″’w x 6’d x 8’-5″’h) such that it works well for the family and for guests.
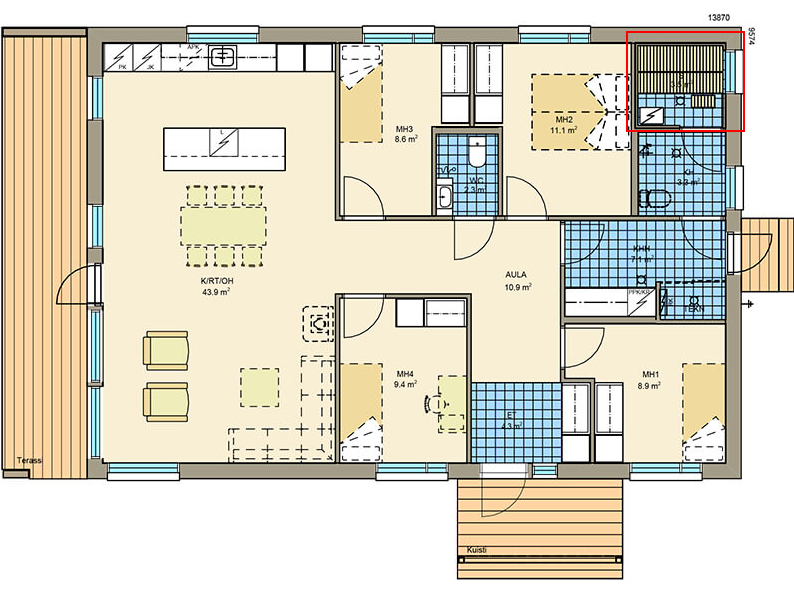
Thermal Suite – A thermal suite with a central commons area for relaxing and maybe cold plunge along with a sauna, steam bath / thermarium and showers can make for a wonderful escape.
A Shower (or four) Is Important – Showers directly adjacent and without having to go outside sweaty in cold weather is almost critical in colder regions. It’s important to shower with soap before first entering the hot room and a cool shower is a good way to cool down after each round. Rinsing sweat off before going outside in cold weather is not really a luxury, it’s basic (unless you plan to jump through a hole in the ice Avanto! or roll in the snow!). The more convenient the showers the more likely they will be used and the more pleasant an experience for everyone.
Thermostatic temp controlled showers are highly recommended. It’s much more pleasant to set the temp to 68°f and know that’s what it will consistently be rather than go through the starting kind of warm then getting really cold then slowly warming back up then too warm so you now have to turn it down routine (that we have to go through since we decided to save some money in the wrong place).
We have two for our sauna; one inside (below) and one outside. In hindsight I wish we had two inside and two outside. In non-winter environs something as simple as a hose (or pre-made hose shower) on an outside wall can work.
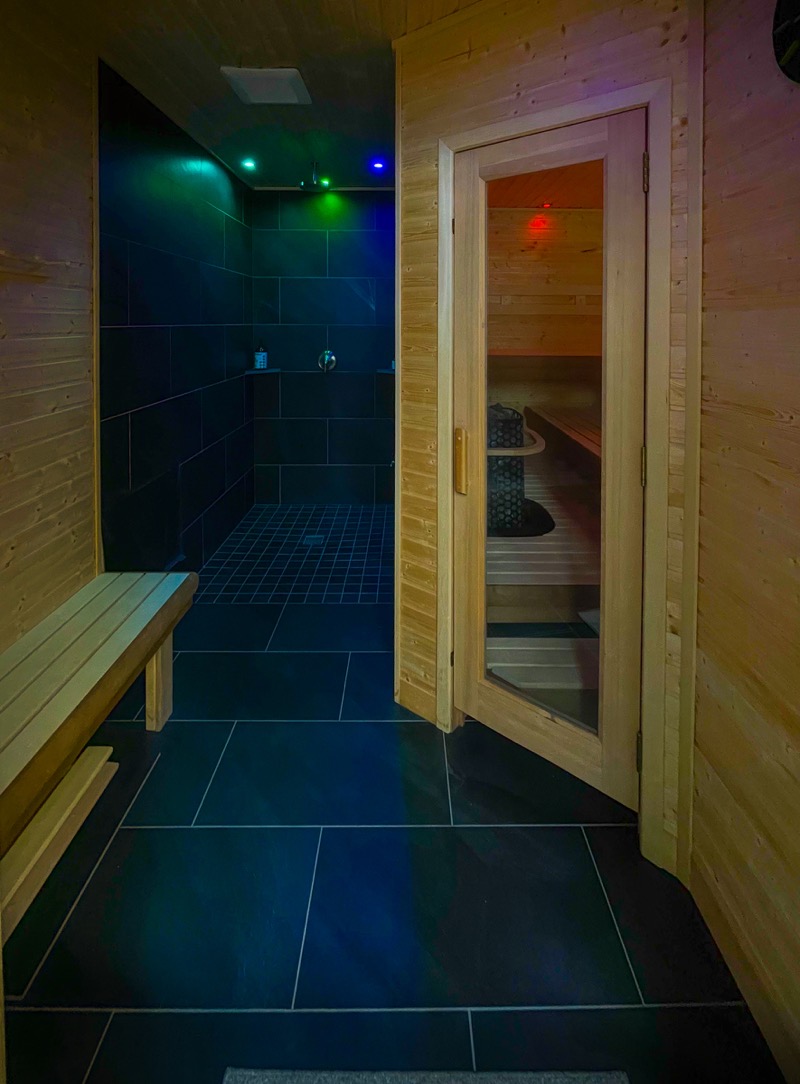
An open or semi-open shower area is preferable to shower stalls with closed doors. This makes showering easier, people are more likely to shower (and remove bacteria and other odor producing gook) and allows people to remain connected and conversations to continue. If room allows, stepping around a corner in to an open shower provides the benefits with a bit of privacy.
Have some fun with showers. Rain heads, dump buckets, waterfalls, body side sprays, fun lighting and other stuff can all be utilized for greater enjoyment. Spas in Europe often have a variety of ‘experience showers’ available. Be careful though, some that look fun are not that pleasant to use so make sure that whatever you select is pleasant for bathers to use not just to look at.
Commons Area (Lounge, Changing, Showers, Vestibule) – This space provides a number of important benefits.
- Primarily, an air-lock function to lessen cold chilling air from blowing in to the sauna.
- Changing in/out of clothes.
- Showering sweat off before going out in to the cold weather and rinsing before entering the sauna.
- A safe way to lock the building without the risk of locking someone in the hot room.
- Prevents sauna doors from freezing closed as happens with standalone hot rooms in cold environments.
- And possibly most important, it’s best to slowly warm up before entering the sauna rather than going directly from cold outside to sauna inside – this area provides a good place to sit or stand for a bit before entering the much hotter sauna. Skipping this warm-up step can lead to what is termed ‘after-drop’ which is not pleasant and can be dangerous.
Finns and others say that this is a critical element of the overall sauna routine so sauna designers in Scandinavia shoot for this to be at least 1.5x the size of the hot room and often much larger. So an 250×250 (8’x8’) hot room for 4 people will have at least an 250×400 (≈8’x12’) changing/shower/vestibule.
A Large Changing Room – The changing room can be a great place to relax, enjoy a Finnish Long Drink, read a book or take a nap. Making this a larger area is never a bad idea. Or maybe even have a central gathering room with the changing/shower off one way and the sauna off another.
Aesthetics – A typical sauna session is about 3 to 4 hours or more. It’s worth investing in a thermal space (sauna + changing + showers + relaxing + steam bath / thermarium + cold plunge + whatever) that is aesthetically enjoyable and ideally has some natural sunlight. We’ll enjoy our sauna much more and we’ll want to use it more.
Building Height – Building so that the floor is about 1m (40”) above surrounding ground provides a number of benefits. One is that it makes it easier to have larger windows and a better view while still maintaining privacy for bathers.
A Covered Porch – When it’s raining or snowing it’s nice to be able to go in and out without the weather blowing down in to the changing room and a sheltered place to sit outside to cool down is quite wonderful. We don’t (yet!) have a covered porch and wish we did.
A Window on the world – Windows have two primary purposes; natural light and a liminal connection to outside and nature. Being able to see outside a little, having a connection to outside while in the sauna is quite enjoyable. Natural light is quite wonderful to have and makes the sauna much more pleasant. It’s also beneficial in case of a power outage to avoid getting burned on a hot heater. One or two small windows usually works well.
Note that I did not list view as a primary purpose. It’s not. However, if you have a great view then a larger window might be warranted though keep in mind; 1) The more window, the greater the thermal stratification, 2) The more glass and less wood the harsher the experience, and 3) people in the sauna can feel like they’re on display with too large a window. For the latter keeping the bottom of the window higher and some well placed vegetation outside can provide privacy and still allow for a view. So, glass, but don’t go overboard with glass.
Note that the glass should be tempered and the frame made of wood. Stay away from vinyl, plastic, PVC, or other materials that could melt or off-gas.
Too Much of a Good Thing – A window to see outside and let in some light is a very good thing. Too much window and especially a full wall window not so much. There are the obvious things like energy efficiency and that windows can sometimes feel cold and that it’s critical to have a lot of soft wood wall and ceiling surface in a good sauna and the more window you have the less wood you have. Windows can also produce an uncomfortable amount of radiant heat. We got to experience this at Ström in Quebec.
There’s more though. A sauna should be a quiet, peaceful, serene and relaxing place of solitude away from the rigors of the world – a bit of an escape. A large expanse of glass can reduce or totally eliminate this. A large window or wall can also make people feel like they are on display which is uncomfortable. And keep cleaning in mind – glass shows gook more than other surfaces and will need to be cleaned frequently.
If you have a really spectacular view it may be worth doing a large window but even here be judicious. Even with a great view I’d argue for a smaller window as it adds a bit of mystery and we’re only in the sauna for about 15 minutes and then outside where we can enjoy the view to it’s fullest. We may appreciate the view much more if we don’t see it 100% of the time.
Skylights – Skylights are tricky in a sauna hot room for a number of reasons. It is possible to do them successfully but I generally do not recommend it. We want the ceiling of our sauna to facilitate the flow of the löyly cavity convective loop for which we want a fairly smooth ceiling and a skylight will, in most cases, interfere with this. The extreme temperature and humidity swings of a sauna result in a lot of structural movement that can make it difficult for a skylight to remain sealed well year after year. A skylight is exposed to the highest heat. It’s replacing desirable wood surface with glass. It is possible to install one insulated glass at roof/curb level and then install another at ceiling level but it’s critical that the cavity between them be very well sealed or you’ll get condensation on the glass.
During a typical sauna session we actually don’t spend that much time in the sauna hot room. 10-15 minutes per round so 30-45 minutes of a 2-4 hour session. We spend a lot more time outside so not having that view of the stars for that brief period is not that big a deal (and makes them that much more special and enjoyable when we are outside looking at them!). A skylight, roof lantern or conservatory ceiling in the lounge area, especially if it can open to vent out hot air, would be a much better investment.
Spigot – A spigot for filling the water bucket and washing the shower can come in handy (shower works for bucket filling too). Be careful that it’s not from a high chlorine source though as you don’t want that on your stones or in your sauna. Make sure that it’s threaded for a hose – a short hose with a sprayer on the end can make cleaning day much easier.
Cleaning – Think about access for cleaning. Skirts should be removable and there should be easy access to areas underneath all benches and platforms. EVERY part of the sauna should be easily accessible for cleaning.
Privacy – Sauna is best enjoyed nude. Providing for some privacy for both inside the sauna building and for an outdoor patio can make for a much more enjoyable experience for all. Note that some materials such as brick can suck moisture out of bare feet that over time result in painful skin cracks so may not be good materials to use.
Four is better than One or Two? Consider at least a four person (8’ benches) sauna. One of the joys of sauna is socializing and enjoying it with others.
Garage Saunas – Be very careful with placing a sauna in a garage. If you ever park petrol cars in there or do woodworking or painting in the garage I would not do it. Saunaing results in stress on your body and breathing in any latent fumes from a car, dust from woodworking or other chemicals during this stress could be extremely harmful to your health. Fresh pure air both inside the sauna and when exiting is critical.
Garages are also not necessarily great places to hang out (I actually enjoy hanging around in a garage with friends talking shop, but not so much for sauna). A typical 3-round sauna session can be 2-4 hours or much longer. Saunas, spas and thermal suites should be in a place that we all enjoy spending time in. A place that’s relaxing and comfortable with every step we take and every second we’re there. It should have fresh air and connections to outside. As tempting as it is to stuff a sauna in to a corner of our garage, that is likely to result in an expensive storage room if it’s a space that we don’t enjoy spending time in.
Garage Conversion – Converting the entire garage or a portion of it in to a sauna or thermal suite can work well. If converting only a portion, make sure that the thermal area is completely separate from the garage area so that there is no air exchange between them. Entrance to the sauna or thermal suite should not be via the garage but from outside or a separate entrance from inside the house.
Basement Saunas – Similar to garages, basements can be less than desirable places to spend much time so some caution is advised. However, they can be made quite nice and especially if they have some natural sun and moon light.
Some Perspective On Temps – The Finnish Sauna Society and International Sauna Association recommend temps of 80-105°c (176-221°f) at bathers heads and shoulders (thermometer or probe placed 1m (39”) above the middle of the longest sitting bench). Many Finns say hot enough that 10-15 minutes is as long as you can stay in. The majority of Finns and Swedes I’ve talked with prefer 90-105°c with occasional warmer or cooler sessions. Lassi Liikkanen is a proponent of temps a bit below 80°c being sauna. Dr. Jari Laukkanen’s study on the benefits of sauna bathing for cardiovascular health found average temps of about 78°c for these older participants (Finns, avg age 63). Russians seem to prefer either slightly cooler with much higher moisture (nothing like a steam room or hammam though) or much higher temps of 130-140°c (266-284°f) with lower moisture. My personal preference is 94-96°c most days with occasional 110-120°c days or sometimes longer rounds of 75-80°c. SO, there’s a lot of variety in ‘correct temps’.
A good electrically heated sauna then should be able to maintain any temp from 70-105°c or better to 125°c or higher.
I think that many people in the U.S. confuse bad air from poor ventilation with heat exhaustion. FWIW, I’m ready to leave a 90°c sauna with bad air after about 12 minutes and the last few minutes doesn’t feel too great. In a sauna with good ventilation I feel quite good for 12-20 minutes at +100°c and every second until I step out feels great. Good ventilation is critical to being able to get the most out of heat and löyly. Poor ventilation resulting in high CO2, common in U.S. saunas, can also result in Hypercapnia.
Fresh Water – You need water to throw on the stones for steam and to dump over your mates heads. Since the Flint Michigan water incident many communities in the U.S. have been significantly increasing the amount of Chlorine and other chemicals in their water systems. These are quite bad in a sauna, especially when thrown on the stones. Make sure that your water supply filters these out or that you use something like a Berkey or RO system to provide clean unadulterated water.
Paint, Stain and Wax – I am a proponent of leaving everything in the sauna natural. If however you do want to wax your benches or stain your walls then look for products from Tikkurila. They are a Finnish company and have a variety of stains and waxes. They have a UK Site in English and a some of their products are available online in the U.S. Something that Lassi L points out is that some of these that seal the wood will also reduce its hygrothermic properties which is not desirable for most people.
Bio-Sauna and Bio-Sauna Devices – A Bio-Sauna is a sauna with somewhat lower temps and higher base relative humidity. They originated in Finland from the ‘womens sauna time’ when women sauna together before the temperature is raised for the mens or all-comers sauna time.
Many people enjoy these as an alternative to the higher heat and higher contrasting humidity of a Finnish Sauna and some, women in particular, prefer them. One good option for producing a Bio-Sauna is the Kastee Baptism. Lassi did a good review here: Testing Kastee Sauna Humidity Control System – Different Types of Steaming.
Another option is a Klafs heater (stay away from the under bench models however!). These are widely available in Europe and the UK. These have not been available in North America but should be sometime in 2025.
Notes on Construction
Disclaimer: I am not an engineer nor a builder so I am far from any kind of expert on wall assemblies (but I sometimes know a little bit about physics and building science).
For some good information on building science I’d recommend two books; ‘Pretty Good House’ by Michael Maines, Daniel Kolbert, Emily Mottram and Christopher Briley. And ‘A House Needs to Breathe…Or Does It?’ by Allison Bailes. Also the website and forums at Green Building Advisor.
Keep in mind that a sauna is a wet environment. It should be treated somewhat like a shower with similar waterproofing on the floor and good ventilation to remove humidity to outside.
Foundation / Floor Structure – Concrete and Wood can both work but there are some caveats. A major drawback to concrete is that it can get cold (it pulls heat out of the air, our feet, etc.) which is uncomfortable on feet and can increase stratification. Duck boards help your feet a little but do nothing about the increased stratification. In-floor heat can make concrete quite wonderful and luxurious though and reduce stratification. A bit of an exception is in summer when you don’t necessarily want to warm the concrete floor but may find that you need to due to stratification.
In most cases a wood frame with a wood floor is best.
The frame for a wood floor should usually be off the ground and can be built on top of poured concrete piers, pre-cast concrete piers, diamond piers, driven piles, helical piles, ground screws, etc. What works best will depend on your local climate and soil conditions. A good example of how a Finnish sauna wood floor with drain is often built is here.
A Basic Wall Assembly:
This is the recommended wall assembly in Finland (and Sweden, Germany, etc.). Wood framing (2×4 in North America) + foil faced rigid foam (PIR) + air gap + interior cladding.
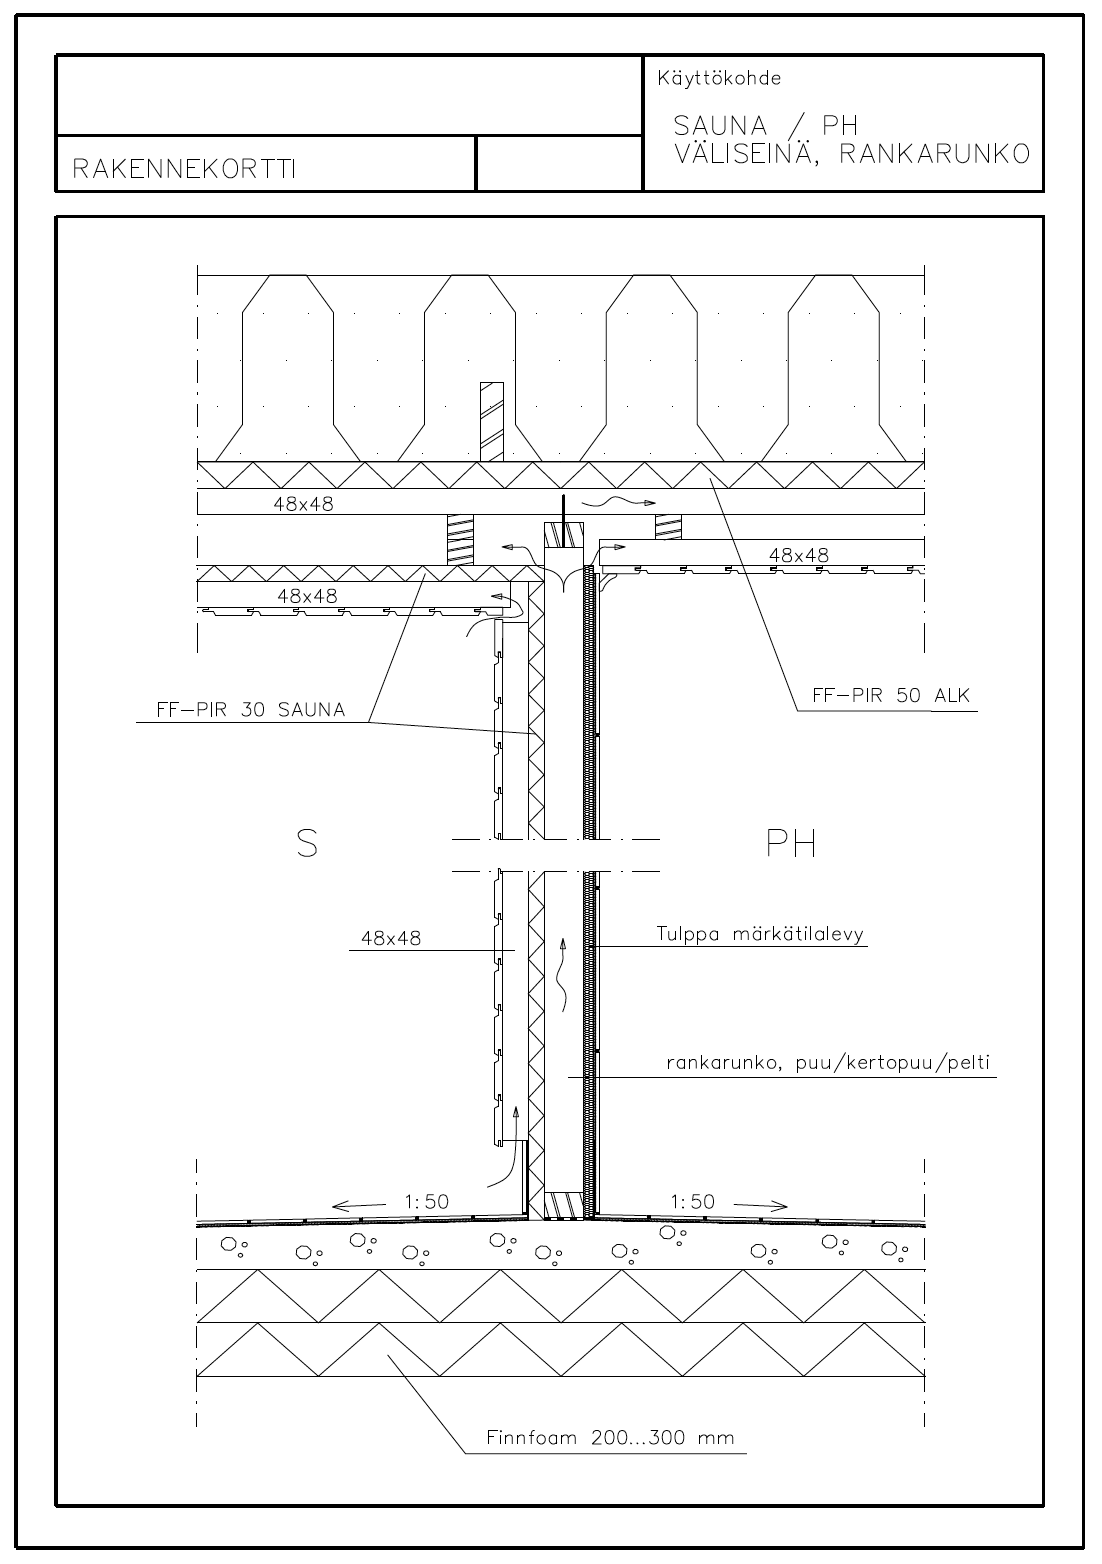
Vapor Barrier – A good sealed vapor barrier is critical for stick built construction. Many people say that a sauna is a ‘dry sauna’ but this is not really the case. 20% relative humidity in a 100°c sauna (actual moisture content ≈ 134 g water / kg air) is about 99% RH at 61°c and at temps below that is… water. For perspective, 90% RH at 26°c, a hot muggy day, is only about 19g of water / kg air. There is a lot of moisture in most saunas.
Saunas are also kind of high pressure; 1) The heat increases pressure (hot flows towards colder), 2) hot air rises and creates even higher pressure in the upper part of the sauna and 3) steam creates even higher pressure again. This higher pressure inside the sauna is pushing out against the walls and ceiling and wanting to take all of that moisture with it. If not stopped by a solid vapor barrier this moisture will condense in the insulation leaving the insulation wet which reduces its effectiveness and given the heat makes an ideal environment for mold and rot. This will not usually dry to the inside or outside. It was driven in to the insulation by pressure and without similar pressure or airflow to drive it out, most of it will stay there.
In Europe the recommended and typical method uses foil faced PIR (polyiso rigid foam). It’s easier to work with than roll foil, seals better, and importantly reduces thermal bridging. It also holds up better long term that paper. One issue with paper is that the higher and changing pressure in the sauna puts pressure on the paper foil resulting in a lot of movement that can eventually cause the taped joints to fail. This is less likely with rigid panels.
Some popular products in Finland and elsewhere include:
- FinnFoam FF-PIR which is made specifically for saunas and has T&G edges for easier installation and better performance.
- Kingspan Sauna-Satu is another good option made specifically for saunas.
- Recticel FF-PIR.
- ISOVER is now also making a foil-faced mineral wool panel.
Unfortunately I’ve not found anyone in the U.S. that sells any of these. Kingspan does have distributors in the U.S. so they might be the best option. Some other options in North America are:
- Johns Manville AP Foil Faced PIR should likely work well and is usually readily available in North America.
- Roxul foil-faced mineral wool panels may also be an option in North America.
Note that this needs to be a vapor or air barrier, not just a vapor retarder. It should have a perm rating of 0.1 or less. It should also be rated for the higher temps of a sauna so at least 120°c or higher. Also note that using FF-PIR like this may technically be against U.S. residential building codes that require a 15-minute thermal barrier between this and occupied spaces. I’ve a note in to Joe Lstiburek to clarify this.
Sauna_Sitter recently raised a good point about moisture retention of mineral wool and I’ve now also heard a similar concern from a couple of sauna builders in Finland. I THINK that so long as it is installed and taped properly and the structure has a proper vapor permeable rain screen that moisture within the wall cavities should not be a problem but this is something to consider. MW is also a favorite of mice so you need to make sure that installation is fully rodent proof. My understanding is that it is no longer popular in Europe because over it’s life it is less environmentally friendly than PIR.
For those in North America who want to use roll foil, a kraft backed foil rated for sauna temps is the ticket.
Bubble wrap type foil should be avoided. It’s more difficult to install and impossible to seal well due to the lumpy surface. Over time it can shrivel up causing gaps to open up, usually due to pulling away from taped joints or simply tearing. Without a good continuous seal the moisture in the sauna can get driven in to the wall cavities eventually resulting in mold and rot.
You DO NOT Want Two Vapor Barriers – The ONLY vapor barrier should be the foil. The structure needs to be able to dry to the outside of the foil. For an outside structure you do ideally want a rain screen / gap behind your exterior cladding.
When insulating avoid paper faced insulation that acts as a vapor barrier.
Insulation – Good and proper insulation in a sauna is important, not so much for energy efficiency as in a house, but for bather comfort. A wall that sucks a lot of heat out can increase thermal stratification and make bathers backs feel cold relative to the front of their bodies and chilly backs can be quite uncomfortable (especially for women). The walls of a sauna will always pull heat from inside to outside – heat always flows towards cold. There is no amount of insulation that can prevent this but we do want to minimize it as much as practically possible. Well insulated walls provide for a better, more even and more comfortable heat on all sides of your body.
I think at a minimum we’d want at least 50mm thin timber (r-2.4). Less than this is very noticeable, especially in colder climates, but 50mm seems minimally sufficient. The colder the outside air the more important the insulation for better bather comfort and energy savings.
Reducing thermal bridging through the studs is important. Traditionally (in Finland, Sweden, Germany etc.) foil faced polyiso (such as this FF-PIR) on the inside provides a good vapor and thermal barrier as well as a better vapor barrier seal.
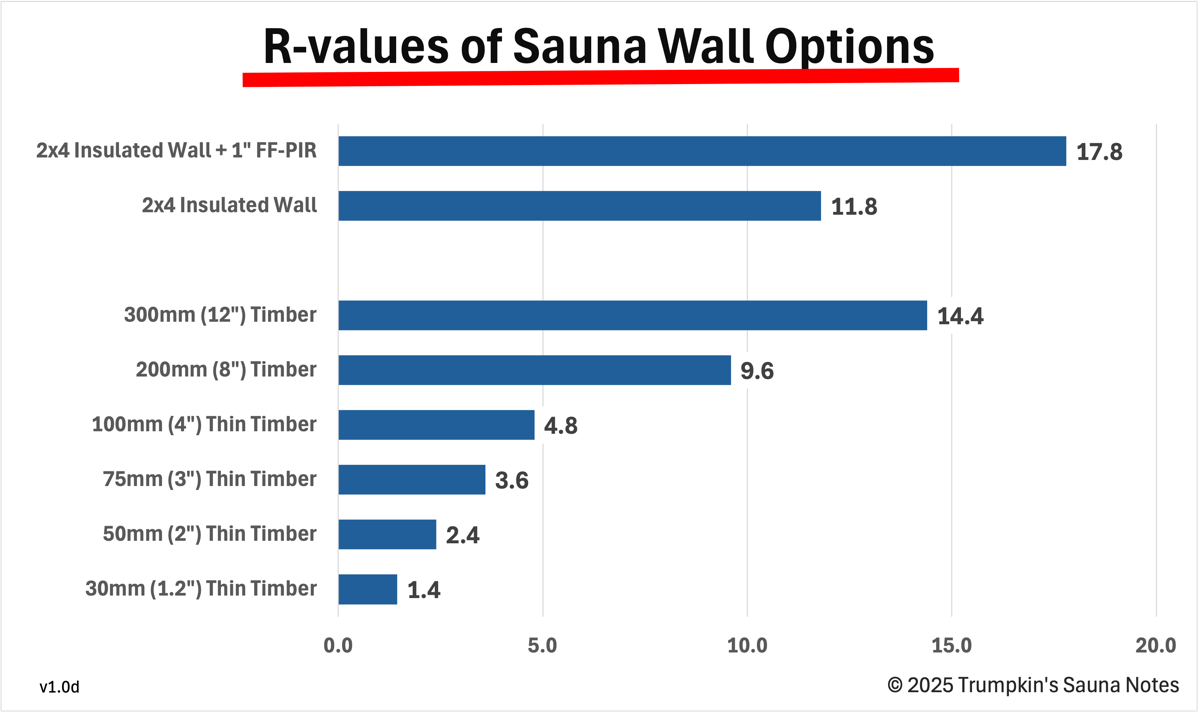
PIR looses its insulation value as it gets cold so either exterior insulation or insulation in the wall cavities or both is still important so that the FF-PIR can work best.
Thick enough exterior insulation can eliminate the need for insulation between the studs however I’m not sure I’d do that for a sauna, especially in a colder environment. Attention must also be paid to the dew point and so condensation in wall cavities which varies by environment.
An interesting article on this: Exterior Insulation on 2×4 Walls Versus 2×6 Walls With Cavity Insulation Only.
Well Sealed – For a sauna to function properly we want fresh air to enter only where we want (primarily above the heater and maybe some down lower for combustion or heater cooling if needed), not where we don’t. For ventilation in a wood or electric sauna to work well we want to seal up air leaks as best we can.
This includes the floor. Replicating an old sauna with an open floor that allows air through is romantic (and kind of cool when you think about the physics of it) but is similarly romantic to using newspaper for insulation in your new house. Just as the newspaper will result in an uncomfortable house, an open breathable floor (or walls) will result in a not-so-great sauna.
A Sauna DOES NOT Need To Breath – You do not want air being sucked in through various leaks which compromises air quality and reduces proper ventilation, and you certainly don’t want the moist air in the sauna to be driven in to the wall cavities where it will reduce insulation value, create mold and possibly rot the structure. You do want air to enter where you want it to (in to the convective loop above the heater for instance) and you want it to exit where you want it to. Nowhere else. You do want an air gap and some minimal air flow between the interior cladding and the foil vapor barrier and you do want the structure outside of the foil vapor barrier to ‘dry to the outside’. Two good articles on this here and here.
Radiant Heat – For the most comfortable sauna we want balanced or neutral radiation on all sides of our bodies – we want the surfaces around us to radiate the same amount of heat as our bodies. If a surface, such as a not well insulated wall behind us, radiates a lot less heat then the portions of our body facing that surface will feel cooler. And likewise, any surface radiating more heat will make us feel hotter on the side facing it such as if we’re too close to the heater. If the surfaces all around us radiate the same as our body then we’ll be heated evenly by convection and löyly which is what we want. Here’s a fun article that touches on this: Why Doesn’t Frost Form In The Carport.
Joe’s Suggestion – Joseph Lstiburek is one of the more highly regarded people in the world of building science. Here is his take on the best wall assembly for a sauna interior. Note that he shows the furring as horizontal for vertical interior cladding – one layer of furring should always be vertical.
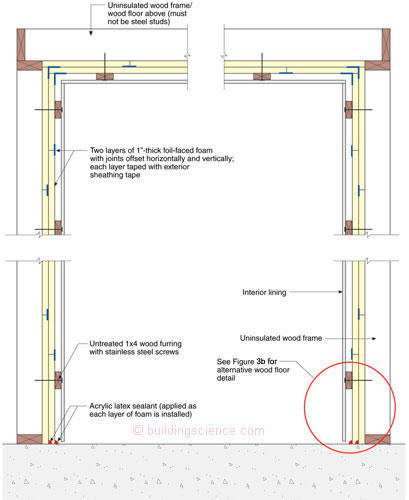
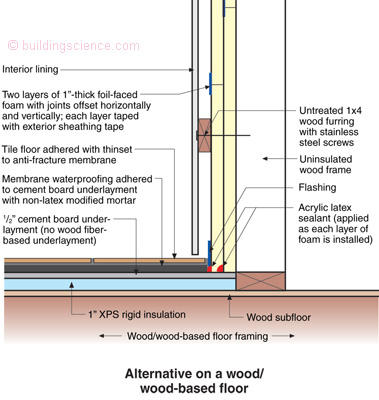
I might make two changes to what Joe suggests; 1) Leave a bit of an air gap between the interior wall cladding and interior ceiling cladding and 2) include a plinth rather than just flashing at the floor (and make sure to stop the wall cladding at least 1” from the finished floor to prevent water on the floor from wetting the wood). For the gap at the top one option would be to stop the ceiling 1” short of the foil on the walls, then stop the wall cladding 1” short of the ceiling cladding, then add a decorative piece to the ceiling a bit out from the wall cladding.
Mind The Gap – As a general rule you never put wood cladding against a non-permeable surface. If you use radiant foil or foil-faced PIR as a vapor barrier (and you should use one of these) then you should include an air gap of 10-20mm (0.5 – 0.75”) between the foil and interior wall boards using furring strips. Furring must be vertical to allow for convective airflow (for vertical cladding then two layers of furring are necessary, one vertical and one horizontal). There are three important reasons for this; 1) No gap could result in increased thermal bridging and a colder more uncomfortable wall because the foil can act as a cold sink helping to suck heat out, 2) so that the back side of the wall boards can dry out and not get mold* and 3) so that the radiant foil can provide some radiant benefit. If there is no air gap then the foil does not act as a radiation barrier and does not reflect any heat back towards the sauna. The air gap is critical for this. Done properly the walls of your sauna will be a bit warmer than without the gap and so provide a more comfortable experience (more details on this in Lassi’s book below).
Some Wall Assemblies Options
- Best – Exterior cladding + rain screen + exterior mineral wool (1-2” minimum) + studs (and insulation?) + foil faced PIR (1 or 2 layers) + air gap + interior T&G.
- Better A – Exterior cladding + rain screen & sheathing + studs (and insulation?) + foil faced PIR (1 or 2 layers) + air gap + interior T&G.
- Better B – Exterior cladding + rain screen & sheathing + exterior mineral wool (1-2” minimum) + studs (and insulation?) + foil vapor barrier + air gap + interior T&G.
- Good – Cladding + rain screen & sheathing + studs and insulation + foil vapor barrier + air gap + interior T&G.
- Not So Good or Bad – Foil with no air gap
Note that rain screen, weather resistive barrier (WRB), sheathing and external insulation come in a variety of mix and match flavors, some all-in-one, some individual. The goal here is to provide structural rigidity, weather/rain/wind resistance, drainage and drying for any precipitation that penetrates the WRB and ideally some exterior insulation and protection from thermal bridging. This entire element along with everything exterior to the foil vapor barrier must be vapor permeable – you do not want a second vapor barrier that could trap moisture in the wall structure.
Building Science Corporation and Green Building Advisor both have good up to date information on various options for wall structures for various climates.
Some exterior mineral wool acts as structural sheathing and some not so take that in to consideration.
For a good overview of some sheathing products that include WRB see Alternatives to ZIP System Sheathing.
Thin Timber Construction – Thin timber construction (timbers less than about 6” thick so perhaps 3-5” thick but the thicker the better) can save a good chunk of money. While a properly insulated and vapor-barriared sauna is best, particularly in colder climates, I do think that given the cost and time savings that thin timber is not necessarily a bad option in some cases. Given monetary constraints it’s much more important to get benches at proper heights and have proper ventilation. Even with thin timber walls the ceiling/roof should be built with proper insulation and vapor barrier.
Thin timber can, I think, be done a couple of ways; 1) The timbers are the interior, exterior and structure or 2) The timbers are the exterior & structure while foil faced PIR + air gap + interior cladding is added to the inside. The latter perhaps better for colder environments while still saving some money over stick frame. I think it’d also be possible to build the former and then some time later add the interior FF-PIR & cladding.
Sound Isolation – The softer the wood used for interior cladding and benches the better along with reducing hard surfaces such as glass, stone or steel. Not having parallel wall/ceiling/floor/bench surfaces or 90° corners will reduce echo in the sauna as well as reducing sound entering or leaving.
Foil faced PIR or similar poly-iso panels rather than just foil directly on the studs along with having the air gap between the foil and interior cladding will reduce structural sound xmission.
On the opposite side of the sauna there are a few options to help reduce sound xmission further; Iso channel between the sheetrock and studs, double layers of sheetrock with green glue, or pre-made sound iso sheetrock.
Lighting
Many saunas have no artificial lighting, nothing beyond the light through a window, and function quite well so the first thing to consider is that lighting is not necessarily necessary. Traditionally the next step up was a lantern hung in a window to augment whatever light there was from outside. And today there are saunas with 22 channels of RGBA lighting.
There are three functions to think about with lighting:
- Safety
- Ambiance
- Cleaning
For Safety we want to make sure that people can see steps, benches, handles/handrails and the heater well enough. And maybe also the top of the door if hitting our head is a concern.
For Cleaning we want to be able to see everything including under the benches. The fewer shadows the better. It’s convenient to have this lighting built in and easily available with the press of a button but it’s also possible to use a portable light for this as well.
Lighting for Ambiance could be an entire book (and there are many good books on architectural lighting). So here some very quick thoughts… Some options include:
- Downlights in Ceiling
- Twinkle or starlights in ceiling (typically fiber optic)
- Sconces on the walls
- Rope light or panels under benches, platforms, behind a ceiling cove or elsewhere
- Accent light behind heater.
Think about the source of the light, the area it will light and the surface patterns it will create as all of these have aesthetic appeal. Putting a downlight in each corner about 8-15cm (3-6”) out from the walls will provide some general ambience lighting and will create some nice patterns on each of the walls. Similarly, doing them along the walls every 40cm or so will create an appealing scalloped wall pattern. This is where looking at lots of photos online is really beneficial.
Heat – Yeah, a lot of standard lights won’t work in the heat of a sauna. Some will, some not. Some LED rope will work lower down where temps are lower but fail when higher up. FWIW, we’ve got LIFX GU-10 downlights in our changing room that is often over 40°c (105°f).
Color Quality – Many LEDs have very poor color quality. Slightly better than florescent but far below incandescent or natural light. Ideally you want high TM-30 scores. For countries that don’t require that the next best thing is a high CRI (at least 90 but over 95 or 98 is better) and a high R9 (red) of over 80 or 90. Another aspect to color is being Warm-Dim capable. Some LED’s will have good color quality at full brightness but quite poor when dimmed. Better LED’s will, similar to incandescent or the sun, produce a warmer color temp as they dim. So full bright might be 3700° but as it dims it gets warmer (lower color temp) so at 20% might be 1900°.
Some LEDs have flicker that can be uncomfortable for some and cause headaches and nausea so something to pay attention to.
Control – Control can be as simple as one switch or as complicated as an RGBA control system with programmed scenes. It wouldn’t be too unusual to have 20 RGBA lights with each individually controllable and programmable to create different scenes. In our case we already have a Control4 home automation system for our home so we use that to control our sauna lighting as well. Home Automation systems like Apple’s HomeKit are gaining increasing capabilities and can be a good option.
Matter – The matter protocol is likely the future of control so it’s a good idea whenever possible to use lighting that supports Matter. This will help to future proof your lighting.
Barrels:
Moved to: Trumpkin’s Notes On Barrels.
Form, Function and Löyly
The above is largely about function and Löyly. It’s about the things that are needed for a good proper sauna experience.
Form is important also and form can enhance function. Sauna can be more enjoyable in a room that is aesthetically pleasing than one that’s not. Should sauna function ever be compromised for form? Perhaps. But not for our sauna, the one we use several times per week. For our routine saunas we want as great a sauna experience as we can get.
Some people may be more interested in form and want only what function fits the form they desire. And that’s OK, it just may not be sauna. Or the löyly is slightly compromised for a really amazing view. And that’s OK (and I’d love to come enjoy the sauna and the view with you). Saunas Of The World is one of my favorite Instagrams because I love architecture and it has some fabulous looking saunas and places, but most of what they feature are either not sauna’s or not good sauna’s. I’d still love to visit many of them though.
Someone may prefer to have all glass walls for instance, and that’s certainly OK. Or they may want lower benches. What’s important is that they understand what affect these will have so that they can make an informed choice – what bit of better sauna experience are they giving up for a better view or not having to climb up higher (and there are some great options for those with disabilities to be able to enjoy a proper sauna).
What’s important is not that every sauna be ideal, that it hits the golden bullseye above, but that people know and understand what compromises to the sauna experience are being made.
Breaking The Rules
Sometimes constraints prevent us from achieving the sauna that we want and in these cases we simply do the best we can. Other times we might choose to intentionally break a rule or two to achieve an aesthetic element. And sometimes we can get away with breaking rules…
Case Study 1 – I’ve recently been involved in a conversation for a ‘campfire’ sauna. The owner wants a U shaped seating arrangement around a central pillar style heater that might have a bit of a campfire feel. I think that this is a great idea, even though it breaks some rules.
Here’s a photo of the sauna at Villa Furuvik just outside of Helsinki that is the inspiration for this project.
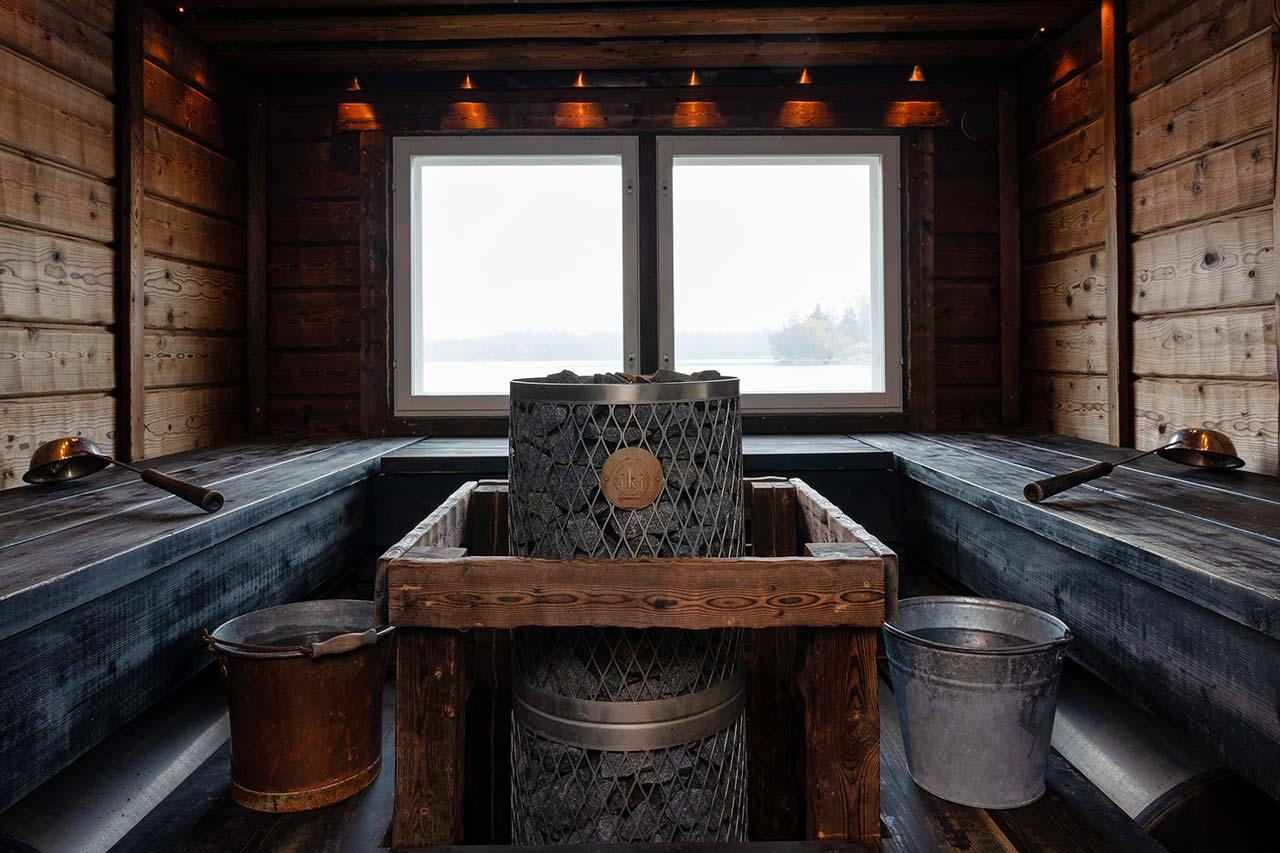
Here’s why this kind of works. First is that this is what some Finns refer to as a party sauna so while it should still provide a good sauna experience, that experience may be somewhat secondary to other aspects including social elements and being safe for people who might have had a bit more alcohol than normal. It’s important to note also that this is retrofitted in to an older shed and so had some unavoidable constraints including overall size and height.
So, let’s break some rules.
Feet aren’t above the stones. They are though just about above the cold zone which is more important here. ‘Feet above the stones’ serves four purposes in one; 1) There is less stratification above the stones and the less head to toe temp difference the better, 2) getting the foot bench above the stones also usually gets feet above the cold zone, 3) feet above the stones forces the ceiling higher to create a good heat cavity and 4) feet above the stones reduces direct radiant heat.
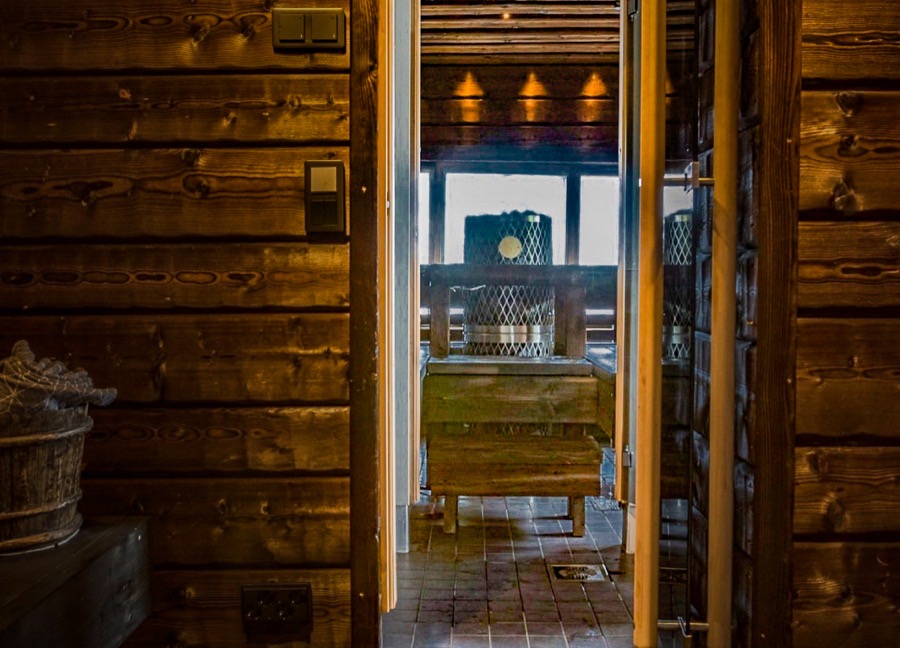
The foot bench / platform here is about 27” above the floor and so is almost above the cold zone.
Open sided mesh heaters are more forgiving. The convective loop can extend down a bit below the top of the stones.
Even though the room is not perhaps as large as they would have ideally liked, it is still somewhat large, about 11’x10’. And, the heater is in the middle so there is even space all around to the walls. These two elements help with stratification. While in a typical smaller residential sauna the stratification changes quite dramatically at about the top of the stones, here it will continue down a bit before we start getting the more quickly changing air temps*. So while in a smaller sauna the floor of the Löyly Cavity is above the top of the stones, here it is a bit below.
And there is a fairly ample heat cavity above the door.
Being above the stones might still be best but this will work relatively well so long as there is good ventilation to also help pull warmer air down.
Too close to the heater. Will people sitting here feel a lot of uncomfortable radiant heat from the heater? If they have the 12” diameter Tylö-Helo / Finnleo Himalaya that we have in ours, yes. Like with many sauna heaters you need to be about 2-5’ away from it for the most comfortable experience. The Iki in the photo and planned for the new sauna is 21” in diameter though and as Lassi Liikkanen points out, should have less radiant heat from the sides due to the much greater amount of stones (and that 21” width of stones). While temps on the sides of the Himalaya can range from 100-150°c, the Iki shouldn’t much exceed 100°c to the sides. Even so, they’ve apparently recently added solid wood around three sides of the heater to reduce direct radiant on bathers.
This sauna may not be one you’d want as your everyday sauna (though I could be wrong on that) but it should serve quite well as a party sauna and will likely be a better sauna experience than 99% of saunas in North America.
Update: Villa Furuvik changed the heater in their sauna. There were two problems with the prior heater; too much radiant heat on bathers and cold feet due to too much heat stratification and steam not going below about shoulder/chest height.
The steam problem is something that has become increasingly apparent over the past few years. Despite the marketing claims of companies that sell tower heaters, bathers have experienced problems of steam still not descending below the top of the stones (Pälsi’s Law or The First Law of Löyly – Feet Above The Stones). Lassi and I along with a couple of others have been confirming this with measurements and Corentin has done some computer modeling that says the same.
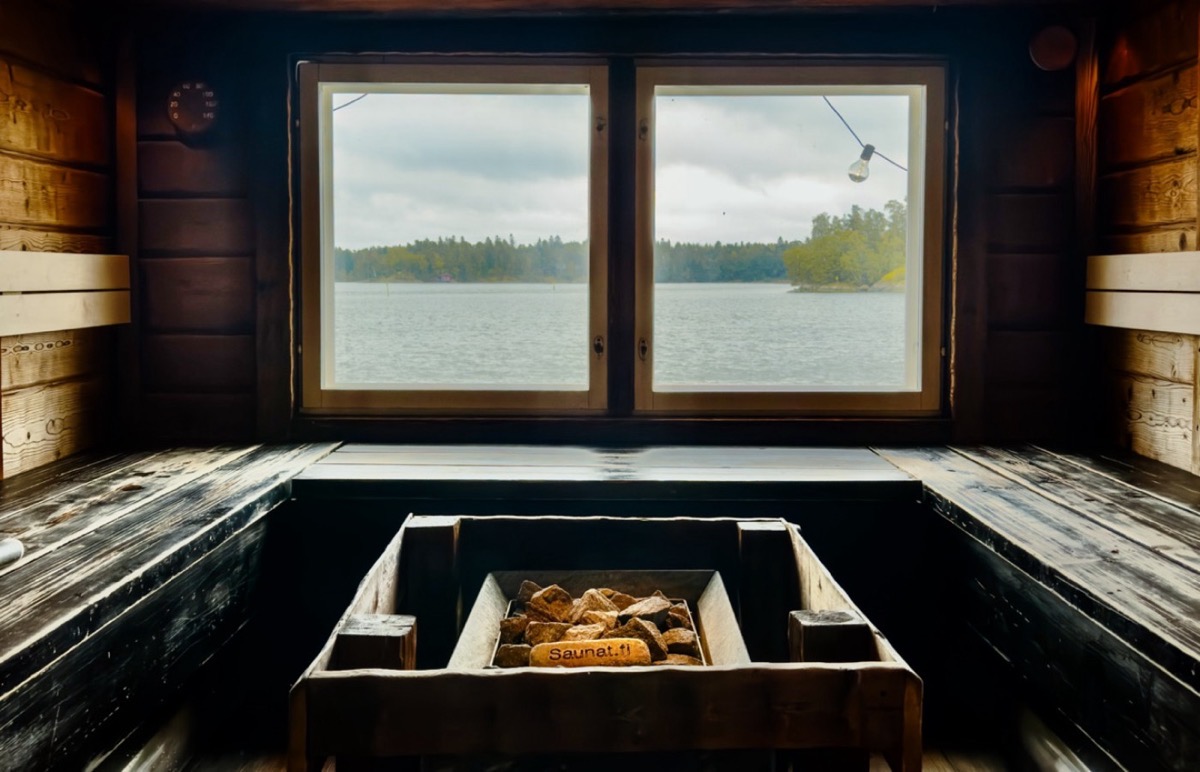
Steam with the new heater gets down to about the sitting bench so waist and upper leg height which is much better. More so, bathers can now pull their feet up on to the sitting bench and get good steam while previously this didn’t help much.
Bathers also feel less radiant heat with the new heater which increases comfort. So overall a better experience.
Case Study 2 – On first glance this sauna at Löyly in Helsinki breaks a number of rules including feet aren’t above the stones nor above the cold zone. Oh, and a lot of extra space above the sitting bench, much more than the 1200mm (48”) recommended.
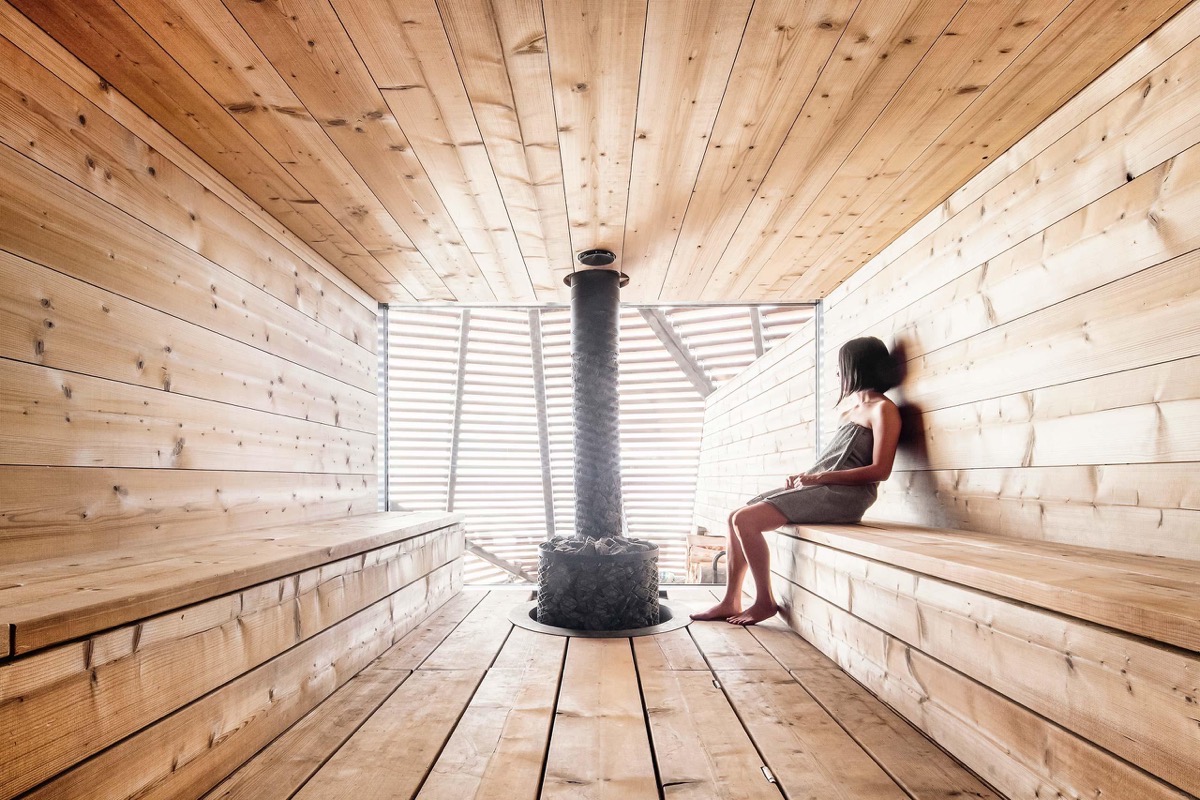
From outside though we can see just how big the heater is and how large of a cold zone was included. The cold zone below the foot bench / platform is well over one-third of the total volume of space. The overall volume of space along with having bathers up this high also allows for a bit more room above the benches. The Iki heater has over 1300 lbs of stones.
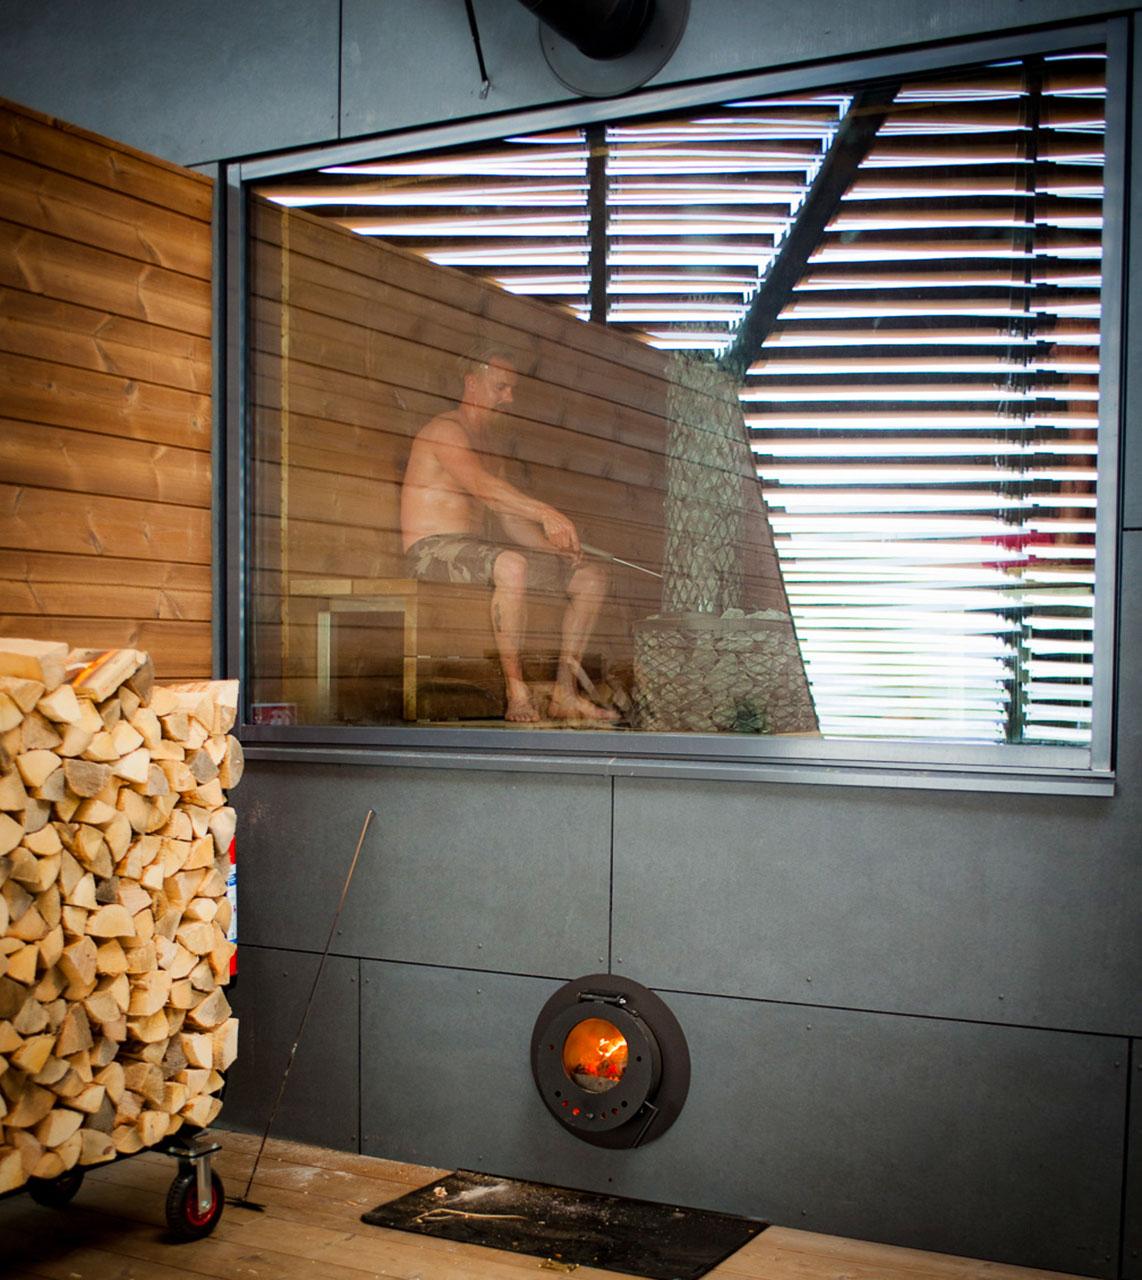
Ideal Sauna Shape?
This is a theoretical / exploratory discussion for those interested.
Earlier we discussed wanting to facilitate the convective loop that forms the löyly cavity but also compress it, and we want to experience as little stratification as possible. In theory then an ideal shape might be;
1) Have the heater wall slope in a bit, perhaps 5-20° but no more. This will narrow the space near the ceiling resulting in less stratification and widen the space at the bottom providing more space for the cold zone and effectively lower it. This will also help to facilitate the convective loop as it will begin directing the rising plume towards the bench wall.
1b) Have the side walls slope in a bit as well for the same potential benefit to stratification.
2) Do a slightly vaulted ceiling (1:3 pitch) with the peak cheated towards the bench wall.
3) Slightly trapezoidal room that’s wider on the bench wall. So if you have an 8’ wide bench wall then perhaps a 7’ or 6’ wide heater wall.
Sloping the walls in slightly will also reduce noise in the sauna as it eliminates the standing waves that are created from parallel surfaces (this is also why recording studios and concert halls have a lot of odd angles).
Cost
Costs vary considerably so for the most part every project is different.
First, doing a lower ceiling, lower benches and lessor ventilation – taking shortcuts for an American psuedo-sauna – will save only about 3-5% but will result in a much worse sauna experience. It’s not worth it. The lower ceiling will in most cases also cost more in energy use per session due to the smaller heat cavity.
It’s possible to build a typical Finnish cabin sauna with an 8’x8’x8.5’ hot room, 8’x12’ vestibule/changing/shower and porch for about $12k (DIY) or about $20-30k if you hire a good contractor. In general materials are about 50% and labor about 50% so full DIY can cut the costs in half.
A DIY build of a smaller 6x7x8.5 garden sauna can be done below $5k (2022 $’s) and then a vestibule/sitting/shower added later.
Nicer aesthetic elements are often the biggest driver of high cost so on the upper end you can easily spend $120k or much more to have someone build it for you with nicer materials, finishes and details. Here labor can easily be 80% or more of the cost. The tile I wanted to use in our shower would have cost about $1300 more than the tile I ended up choosing. Doing decorative wood designs can easily add $35k or much more in labor.
While insulated frame construction is best, there are some significant cost savings to be had in doing thin timber (2.5” – 4”) walls and I’d take a well designed thin timber sauna over no sauna any day. A hybrid of all walls being thin timber except the primary bench wall could provide some cost savings and somewhat eliminate the biggest downside to thin timber which is bathers having chilly backs. A thin timber cabin with proper bench heights and ventilation could be a great starter sauna.
Thermometers and Other Measurement Devices
Moved to: Notes on Thermometers and Other Measurements
Cleaning & Maintenance
The best resource I’ve found on cleaning: How To Clean The Sauna and 9 Tips For Cleaning A Sauna Ecologically
Resources:
Web Links:
Sauna Ventilation – Finding Good Pure Air
Building A Sauna In 13 Minutes Video – By Andrejs Vasevics in Latvia.
The Upper Bench podcast: Secrets of Sauna Design with Lassi Liikkanen.
Books:
EVERYONE building a sauna should read Lassi Liikkanen’s ‘Secrets of Finnish Sauna Design’. I’ve read over 30 books on sauna and sauna design. This is the best and most accurate I’ve found. I wish it had existed when we built our sauna as it would have saved me a lot of research time, a lot of headaches and two remodels.
Lassi also provides consulting services that can be well worth it for those interested.
Other Worthwhile Books:
- Sauna: The Finnish Bath (H. J. Viherjuuri)
- Building A Traditional Finnish Smoke Sauna (Hiltunen)
- Social Sauna – Bathing and Wellbeing (Withers)
- Villas and Saunas Of Finland (Hautajärvi)
- The Sauna Book (Johnson & Miller) – Overall good with some good info on construction details. Some info such as on ventilation is quite dated however.
- Finnish Sauna: Design & Construction (Rakennustieto Publishing) – Overall good though somewhat dated information. This book is very interesting from a historical perspective but Liikkanen’s book above is largely considered to have superseded it.
- The Modern Sauna (Konya)
- The Businessman’s Guide to Finnish Sauna (Arto Paasilinna)
- The Opposite Of Cold (Nordskog & Hautala) – One of the best coffee table books for those in North America.
- Sauna Studies (various)
- Suomalainen sauna =: The Finnish sauna (Antti Arstila)
- The Sauna Is (Hillala)
- The Best Part of a Sauna (Peterson, Dupre)
- International Handbook of Finnish Sauna (Konya)
- Sauna Magic (Conover)
- Finnish Sauna (Konya)
- Sauna As Symbol (Edelsward)
These are not specific to sauna but worthwhile books for anyone building a sauna.
- Pretty Good House (Maines, Kolbert, Mottram and Briley)
- A House Needs to Breathe…Or Does It? (Bailes)
- Thermal Delight in Architecture (Heschong)
- The Architecture of Bathing: Body, Landscape, Art (Pearson)
Thermal Experiences:
- Cathedrals Of The Flesh (Brue)
- Sweat (Aaland)
- Thermal (Bro)
- Thermea et Balnea (Nielsen)
Banya:
- With Light Steam (MacWilliams)
- Without The Banya We Would Perish (Pollock)
Anyone who builds saunas professionally should read or at least browse in depth: This document, ’Secrets of Finnish Sauna Design’, ‘Sauna: the Finnish Bath’, ‘The Sauna Book’, ‘The Sauna Is’, ‘Finnish Sauna: Design & Construction’, ‘Pretty Good House’ and ‘A House Needs to Breathe…’. The latter two are not specific to sauna but to construction practices. Together these should provide a good foundation on some history, how sauna has developed over the past 50 years, and what current best practices are.
I’ve about twenty other books on sauna not listed because they are simply not worthwhile.
CAD Software:
SketchUp – I think the easiest for most people to learn and a very capable app. The app version ($349 / yr) is IMO leaps ahead of the web or iPad version so if you’ll be using it much (or get frustrated easily) then bite the bullet for a subscription. A keyboard, trackpad and iPad pencil make the iPad version much less frustrating.
A few people have told me that the Green Building Advisor tutorial is worth the investment.
FreeCAD – More capable than SketchUp but a bit steeper learning curve.
ArchiCAD – Professional BIM app. I think the most popular app used by architects in Europe and Asia. Increasingly used in UK and to some extent U.S. This is my go-to for projects I work on.
Revit – Professional BIM app popular in English speaking countries. Owned by Autodesk (AutoCAD).
AutoCAD – Professional drawing app.
Still To Learn:
We see extremely high particulate matter (1.0, 2.5 and 10.0) when ladling water on to the stones. Part of this and possibly all of it is bits of stone breaking off and disbursing with the steam. I’d guess some of it is also from the calrods which isn’t good.
We’re still trying to figure out a good reliable way to measure CO2 near bathers faces during a sauna session. It’s easy to do at lower temps like 60°c but not so much at 90°c which is above the temp range for most meters. Airflow will be different then too so why I’d like to find a good way to measure it.
Misc Resources:
Paint / Stain:
Lighting & Other Stuff:
WDT – WDT offers a variety of lighting, steam and control products for sauna and steam rooms.
Spectra (Sauna360)
_________
* If the vapor barrier is well sealed then there is not likely to be much or any moisture on the back side of the interior boards.
